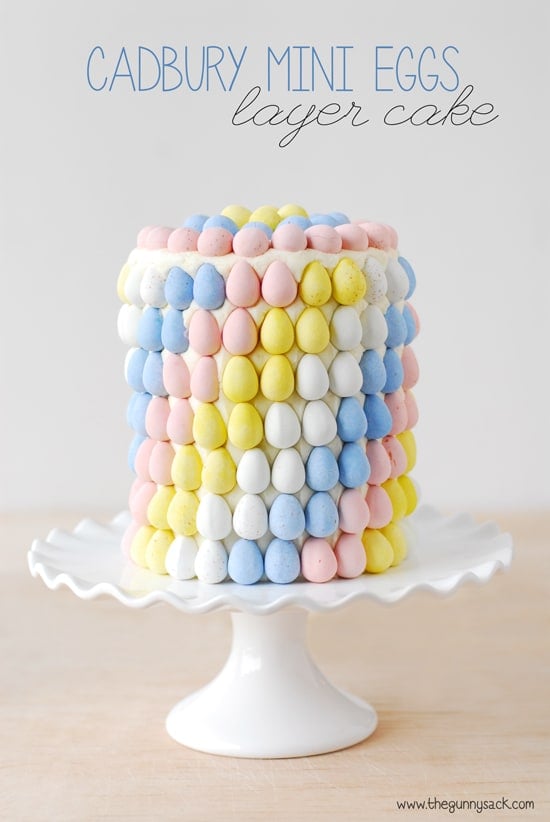
A beautiful Cadbury Mini Eggs Layer Cake for Easter and spring celebrations. This cake has 3 pastel layers, buttercream frosting, and pastel chocolate eggs.
What is it about Easter candy? I think it might be my favorite holiday candy. I love all of the chocolates and bright spring colors from the Cadbury eggs to the jelly beans. But who am I kidding? I love candy from all of the holidays and when there isn’t a holiday, I love the regular candy. So, it is only logical that I should make an Easter Cake that is a Cadbury Mini Eggs Layer Cake!
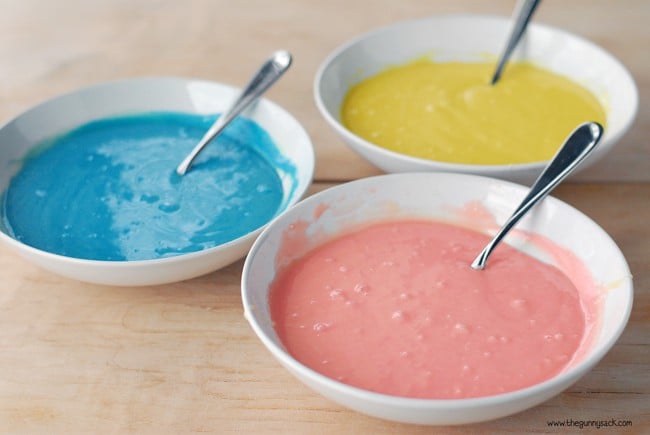
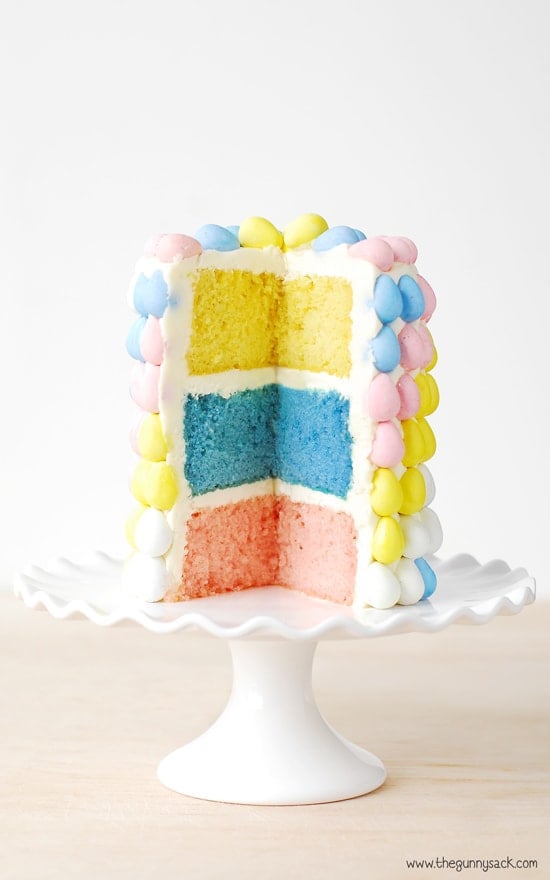
Start by mixing up your cake batter. I used a white boxed cake mix and added the ingredients called for on the box. Next, color the cake batter pink, blue and yellow for a 3 layer cake.
I used three Wilton 4 inch springform pans because that was all I had available for small pans. I tightly wrapped on the outside with aluminum foil and placed them on a baking sheet. You can use Wilton 6 inch cake pans and your cake will be a little wider and a little shorter. I put about 1 1/2 cups of batter into each pan and baked them at 350 degrees for 25-30 minutes until an inserted toothpick comes out clean. (If using 6-inch pan, bake for 15-20 minutes.) The cakes rose up over the tops of the springform pan and I used a serrated knife to cut off the tops once the cakes had cooled, making them nice and flat for stacking.
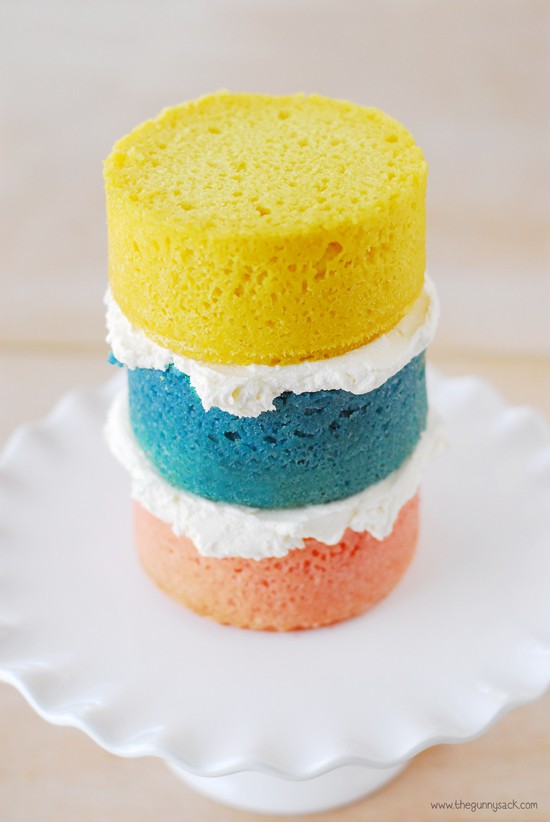
Once the cakes have cooled completely, spread a little frosting in the center of the cake platter and place one of the cakes on the frosting. Spread about 1/3 cup of buttercream between the layers.
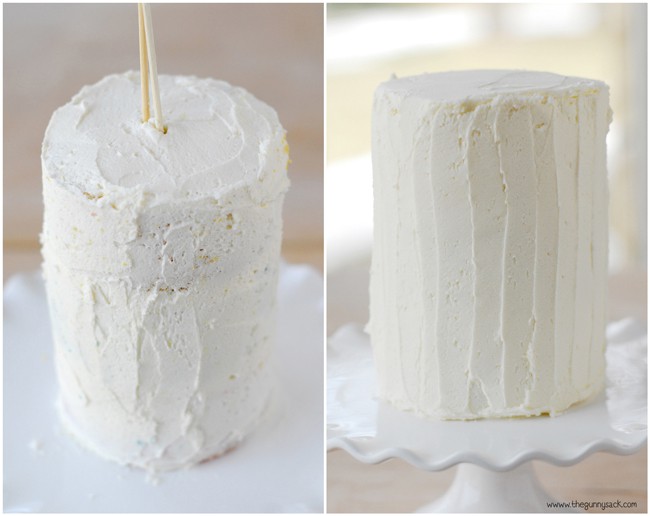
Cover the entire cake with a thin layer of frosting, making a crumb coat which will seal the crumbs in place. To make this step easier, you can thin your buttercream a little so that it spreads easier. Place the cake in the fridge to allow the frosting to set.
Once the crumb coat frosting is dry to the touch, frost the cake with the buttercream frosting.
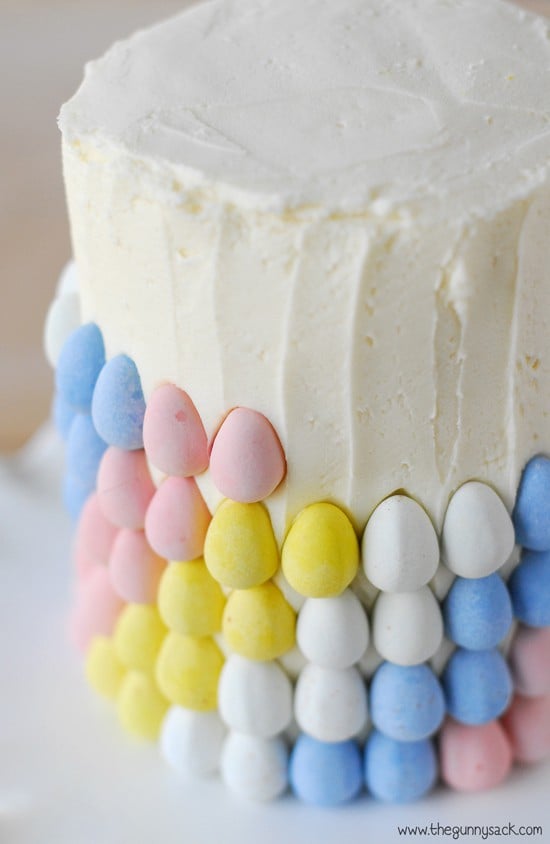
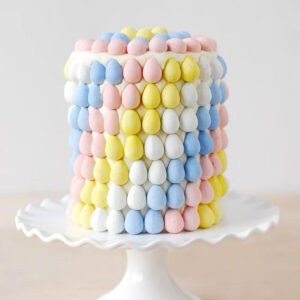
Press Cadbury Mini Eggs into the buttercream. To make a pattern, I placed pairs of the colored eggs next to each other in rows around the cake. Each time I added a row, I moved the pattern over one egg. This gave the cake a pretty, striped, swirl look.

Put the Cadbury Mini Eggs in a circle on the top of the cake.
Put the cake in the freezer for 2 hours before serving. Dip a knife in very hot water, quickly dry it off and use the hot knife to easily cut the very cold cake. Re-dip and dry the knife for each cut you make. This fun Cadbury Mini Eggs Layer Cake is the perfect Easter cake to share with your family and friends!
Cadbury Mini Eggs Layer Cake
Ingredients
Cakes
- 15.25 oz white cake mix
- ½ cup vegetable oil or canola oil
- 1 cup water
- 3 large eggs
- red, blue, and yellow food coloring
Buttercream Frosting
- 1 cup butter, softened
- 1 cup shortening
- 2 teaspoon vanilla
- 8 cups powdered sugar sifted after measuring
- 1/4 - 1/2 cup heavy cream
Decorations
- (4) 10 ounce bags of Cadbury Mini Eggs
Instructions
Cakes
- Preheat the oven to 350˚F. Beat the cake mix, vegetable oil, water, and eggs for two minutes on medium speed.
- Put 1 1/2 cups of cake batter into 3 separate bowls and add food coloring to make pink, blue and yellow cake batter.
- Pour into greased cake pans and bake at 350˚F for 25-30 minutes for 4-inch springform pans or 15-20 minutes for 6-inch cake pans. Bake until an inserted toothpick comes out clean.
Buttercream Frosting
- Beat the butter, shortening, and vanilla for two minutes, until creamy.
- Add powdered sugar, 1 cup at a time, beating after each cup.
- Beat in 1/4 - 1/2 cup of heavy cream until light and fluffy. If necessary, add additional heavy cream, 1 tablespoon at a time until it is the consistency you want.
Assembly
- Once the cakes have cooled completely, spread a little frosting in the center of the cake platter and place one of the cakes on the frosting. Spread about 1/3 cup of buttercream between the layers.
- Cover the entire cake with a thin layer of frosting, making a crumb coat which will seal the crumbs in place.
- Once the crumb coat frosting is dry to the touch, frost the cake with the buttercream frosting.
- Press Cadbury Mini Eggs into the buttercream frosting making a pattern.
Nutrition
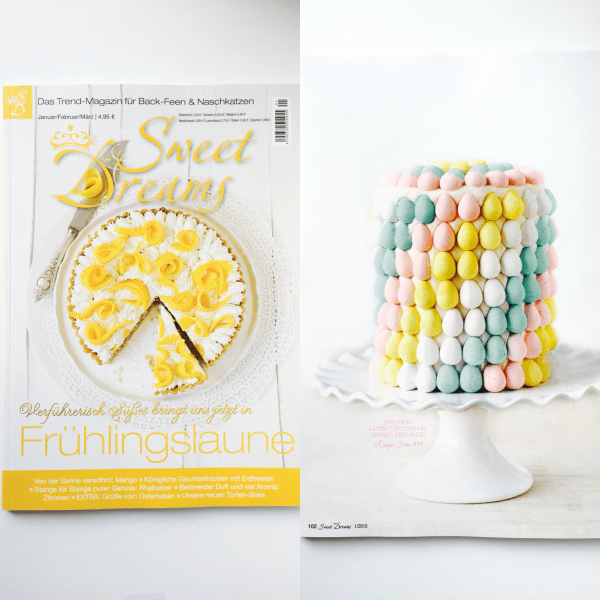
This cake was featured in the January/February/March issue of the Sweet Dreams magazine, available on newsstands in Germany, Italy, Spain, Austria, Switzerland, Belgium, Netherlands and Luxembourg.
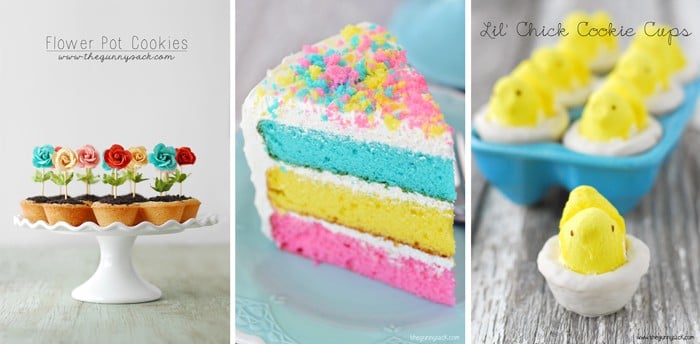
Flower Pot Cookies | Easter Cake Recipe | Lil’ Chick Cookie Cups


Cakey says
How can I make this with no box cake mixes?
Tonia says
Hello! You can use your homemade cake mix recipe. One box cake mix (like the recipe calls for) is enough for one 9×13 cake. Divide it in three and tint the cake mix with food coloring. Best of luck!
Susan says
Hi Tonia! Could you please tell me what size cake pan (4-inch springform pans or 6-inch cake pans) you used in the photo?
Thank you!
Susan
Tonia says
Hi Susan,
I used these 4-inch pans http://amzn.to/2o3gFGC
Best of luck!
~Tonia
Nancy Adams says
This is a really cute cake. However in your icing recipe you call for 8 cups of powdered sugar and in parenthesis next to that you put (1 box). One box of powdered sugar equals 4 cups of powdered sugar NOT EIGHT. So in the midst of making this cake your wondering what do I do? Is this a misprint? Which is correct? One box or eight cups?? Wanting the cake to turn out you just decide you better do what the recipe says. So I did the 8 cups and the icing was horrible. In the trash it went. I think it would be a good idea to call out the size of cake pan used right in the list of ingredients since it is very unusual size.
Tonia says
Hi Nancy,
I’m sorry you were disappointed with the buttercream frosting. The recipe calls for 8 cups powdered sugar (about 1 bag). Here in Minnesota, 1 bag of powdered sugar is equal to 2 pounds or about 8 cups. I hope you were able to find another buttercream frosting recipe that fit your needs.
~Tonia
Heather says
This cake is beautiful! I put a link to a post I wrote on my blog- I hope I get time to make this cake!
Heather
Lilly says
Wow. This one is very creative and delicious as well I never thought of egg inspired cake even though their are more ridiculously amazing designed cake now a days its just that egg cake never crossed my mind, its very unique and hope you can share some more recipes to us. two thumbs up
Kyle says
Now that would make a great birthday cake. 🙂
Tonia says
Thanks Kyle!
YUMA says
Hola déjame felicitarte muy linda soy de Venezuela y tengo dudas no si si la MANTECA a la que dice la receta es manteca de cerdo o margarina, la única manteca que conozco es de manteca de cerdo gracias
Tonia says
Hi Yuma,
Using Google Translate your comment shows up as “Hello let me congratulate very cute am from Venezuela and I have no doubt if if MANTECA to which the recipe is lard or margarine, only butter I know is thanks lard”
Thank you! The shortening in this recipe is vegetable shortening, made from vegetables. I’m not sure if they sell it in Venezuela but it looks like the brands “Clover and Blanquita” are sold in South America. I’ve never cooked with lard, but it is made from animal fat. And of course butter comes from cream. Happy Baking!
Translated: ¡Gracias! El acortamiento en esta receta es la manteca vegetal, a base de verduras. No estoy seguro de si lo venden en Venezuela pero parece que las marcas “Clover y Blanquita” se venden en América del Sur. Nunca he cocinado con manteca de cerdo, pero que está hecho de grasa animal. Y, por supuesto, viene de la mantequilla crema. Hornada feliz!