
Philips Hue wireless lighting from the Apple Store is perfect for food photography.
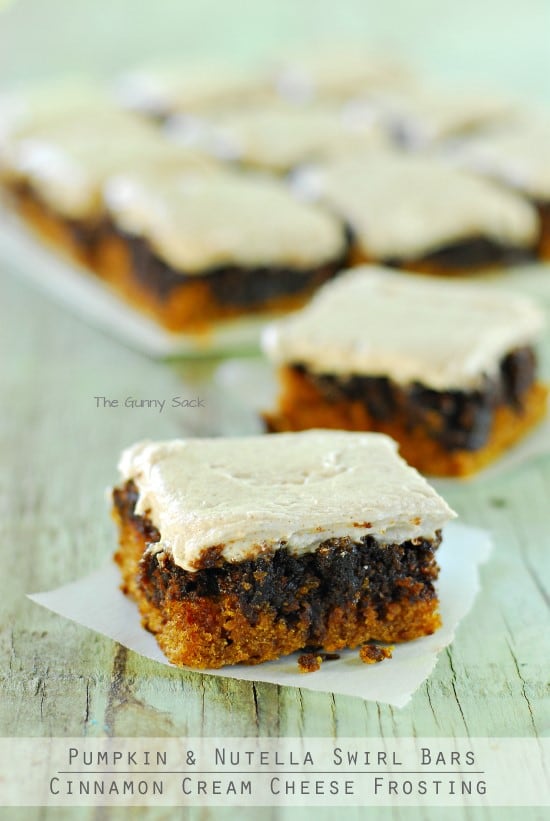
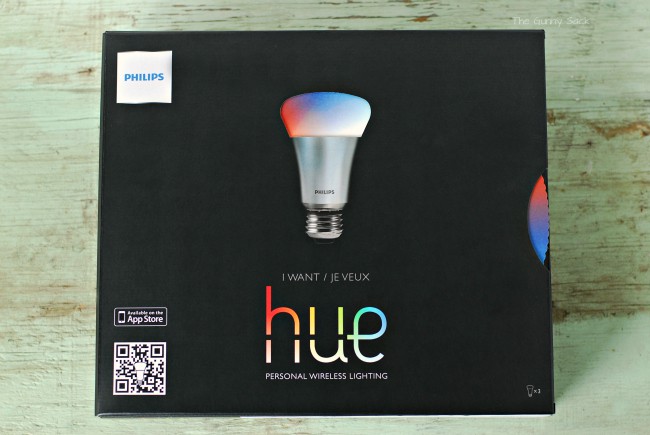
My love for pumpkin desserts continues with these Pumpkin & Nutella Swirl Bars with Cinnamon Cream Cheese Frosting! Last weekend, I volunteered to bring a dessert for a family dinner. I was walking around the grocery store trying to figure out what to bake and I knew it had to be something with pumpkin. My friend made some delicious pumpkin bars earlier in September so that inspired me to make pumpkin bars. Of course, plain pumpkin bars are delicious but I added Nutella to the bars and cinnamon to the frosting! Plus, while photographing these bars, I got to try out a cool new photography tool that I just purchased from the Apple Store at the Mall of America! It is called Philips Hue Personal Wireless Lighting.
Well, it isn’t necessarily a photography tool, in general but that is what I plan to use the lights for provided I can keep the bulb from disappearing from my photo boxes and appearing in my kid’s bedroom lamps! Philips Hue is a lighting system that is wirelessly and controlled via an app on an iPad or iPhone. I can use the app to turn lights on and off. That would really come in handy for all of the times that my kids leave their bedroom light on or for when we are .
Another neat feature is that I can set a timer so that lights will come on at a certain time. During the winter months, it is dark when we get up in the morning before school. These Philips Hue lights can be set to slowly brighten a bedroom in the morning!
But the coolest thing about the bulbs is just as the name implies: you can change the hue! They can display any color you want. You can change one bulb at a time or set up a whole bunch of bulbs in a light recipe of your own.
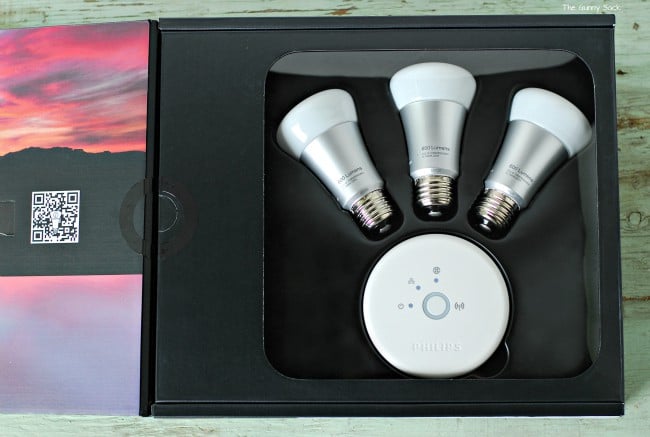
Our starter kit came with 3 Hue bulbs and the bridge. The Apple Store also had Philips Hue LightStrips, Philips Hue Bloom lamps and individual Philips Hue bulbs. They can all be connected to the same bridge. Set up is so easy that my tween did it! I didn’t have time to get it set up when we got back from the Mall of America and Vanessa was super excited to try it out so she asked if she could set it up!
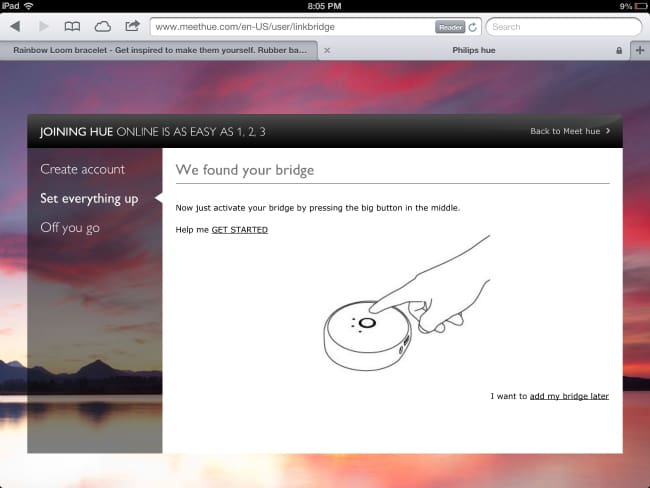
There are three steps to get things set up.
Step one: Screw your Hue bulbs into your lights/lamps and turn on the lights.
Step two: Plug the hue bridge into an outlet and connect it to your Wi-Fi router.
Step three: Download the app and follow the instructions.
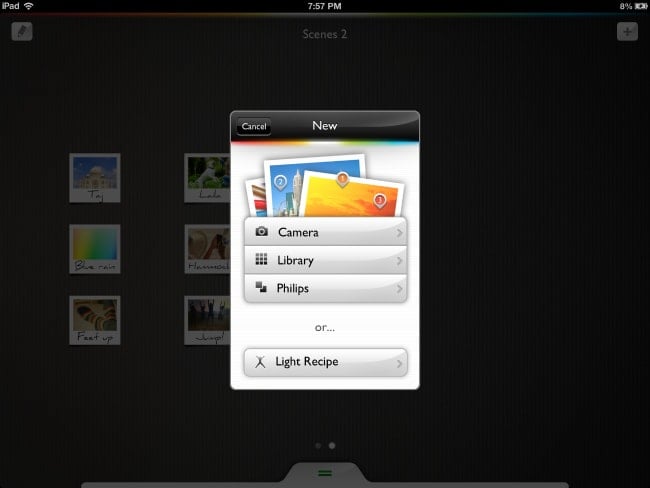
We can use the app to create scenes based on photos, ready made Philips scenes or create our own light recipe. There are some ready made settings for when you want to relax, concentrate, energize and read. My kids have used the concentrate light recipe for doing homework.
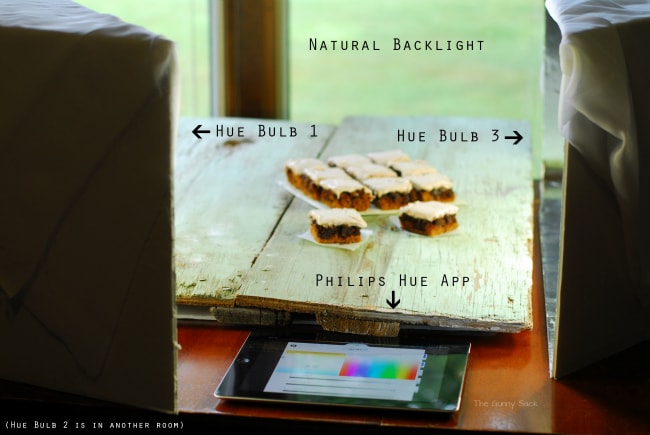
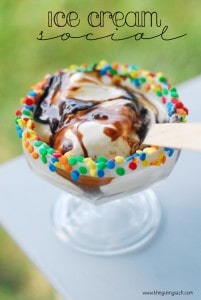
To take the pictures of the Pumpkin & Nutella Swirl Bars, I set a piece of wood on a table in front of a window so that there is backlight. Hue bulb number 1 is on the left and number 3 is on the right. (Bulb number 2 is in another room.)
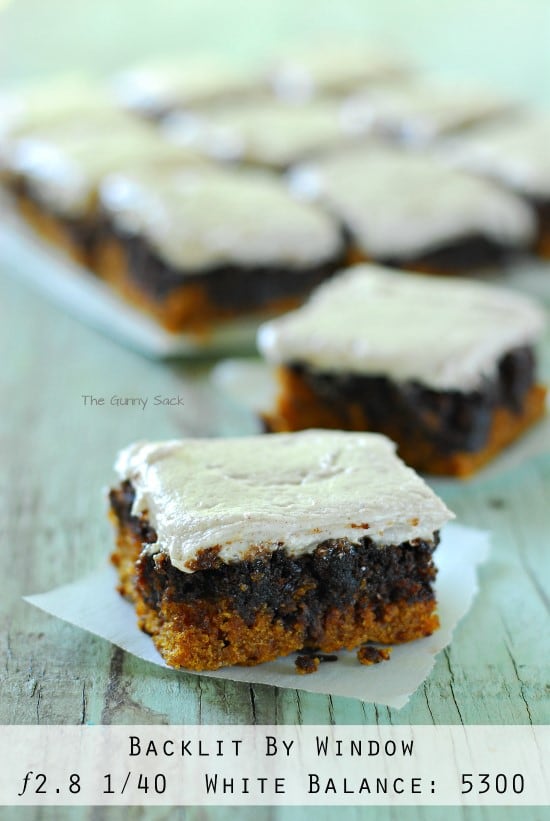
For my first shot, I left the Philips Hue bulbs off and only used window light. I set the white balance to 5300, the aperture to f/2.8 and the shutter speed to 1/40 and took this shot. It looks pretty good but looks blue.

Next, I turned on the Philps Hue bulb to the left and the one on the right. I set them both to the warmer end of blue and took this photo. I really like the added light from the left and right. It fills in the shadows and warms up the image. But I felt like it was too warm.
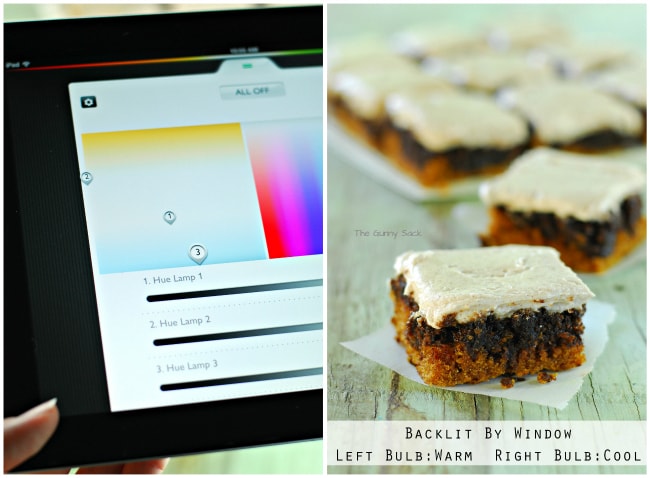
So, I kept the left bulb in the same setting and set the bulb on the right to be all the way to the bottom of the cool blue. Then, I took another picture that looked perfect to me! The light from the left is warm and the light from the right is cool.
I did a few simple edits of the warm/cool photo and this was the end result. I love how it turned out!
My whole family is having fun trying out Philip Hue and look forward to trying out more light recipes. I think the lights are going to be so helpful for food photography this winter when I will have less natural light to work with!


Robert says
Nice work. Found your blog after googling “philips hue photography”. I am surprised how few of the pro photo sites have picked up on the low budget versatility of Hue.
I’ve been shooting using Hues for the last few months for a blog series launching in 2017. I have a few 5000°K fluorescent studio lights and it’s easy to match the color of those with the Hues. And I can put them in normal light fixtures that many pro bulbs won’t easily fit.
Have you found any other good resources for Hue photography resources?
PS: another Minnesotan here 🙂
nycsfo says
That’s very clever, not a use I thought of yet. Well done!
Tonia says
Thank you! I think my kids are having the most fun with the bulbs!
Jen says
When I saw these lightbulbs the first things I thought was. What a cool way to conquer crappy light. I wonder how bright they are and how they compare to professional grade photography lighting. Thanks so much for review. Do you think it could work for people photography?
Tonia says
They are as bright as a regular light bulb. I haven’t tried using them to take pictures of people yet but will have to give it a try!
Kelly @ old blue silo says
Wow, this is so cool! I kept shaking my head reading this thinking “What will they think of next?” My husband’s grandma is always saying that 🙂
I love how you applied these to your food photography. Genius!
P.S. The pumpkin bars look delish!
Adelina Priddis says
That is just awesome! I think I need these solely for photography use!
Anne @ Domesblissity says
Ok, now you’re getting too technical for me Tonia. Beautiful photos though.
Anne xx
Tonia says
This one is easy Anne! Like I said, my daughter set it up without any parental help. I’ll bet your kids would have a blast with these lights! Have a great weekend and enjoy the first day of spring down under!
Jenna says
Very interesting, and Very cool! You’ve just proved that there is an App for everything! I love your photography tips!
Tonia says
Yes there really is! I think I’ve downloaded 4 apps in the past 24 hours! Thanks for stopping by Jenna!
Tonia says
Thanks Jennifer!
Jennifer says
How cool is that! I always love hearing about your photography tips.
Heidi M says
Great, thanks! 🙂
Heidi M says
Could you please post the link to this recipe or post it? It looks so yummy! Thanks!
Tonia says
Hi Heidi,
Thanks for stopping by! I am working on the recipe post right now and will hopefully have it ready to go live tomorrow.
~Tonia
Anna Bennett says
Tonia,
I like the way those light bulbs change colors. They are so cool looking.
Now I have to ask if you would PLEASE send the Recipes for the:
Pumpkin & Nutella Swirl Bars and the Cinnamon Cream Cheese Frosting?
They look so good. PLEASE !!!
Tonia says
Hi Anna,
Yes, I will be posting it tomorrow! Thanks for asking!
~Tonia
Jane's Adventures in Dinner says
AMAZING! You teach me something fantastic every time you post.
Tonia says
Thanks Jane! I love hearing that!
Mallery Schuplin says
I swear you are the light box guru! I like how simple this was for you to set up!
Tonia says
Thanks Mallery!