Wondering how long to boil corn on the cob? We’ve got you covered with this classic boiled corn on the cob recipe. Serve hot with lots of butter and salt.

After trying so many various ways of cooking corn on the cob, I came to the conclusion that my favorite way is boiled corn on the cob.
It’s not the easiest way to make sweet corn but I like the flavor and texture. Maybe it’s because that is how my mom always made it, so it is what is most familiar to me.
I can’t even remember how many times I’ve called my mom over the years to ask her low long to boil corn on the cob. Finally, I’ve got it here in a blog post, so I won’t have to keep asking her!
How To Boil Corn On The Cob
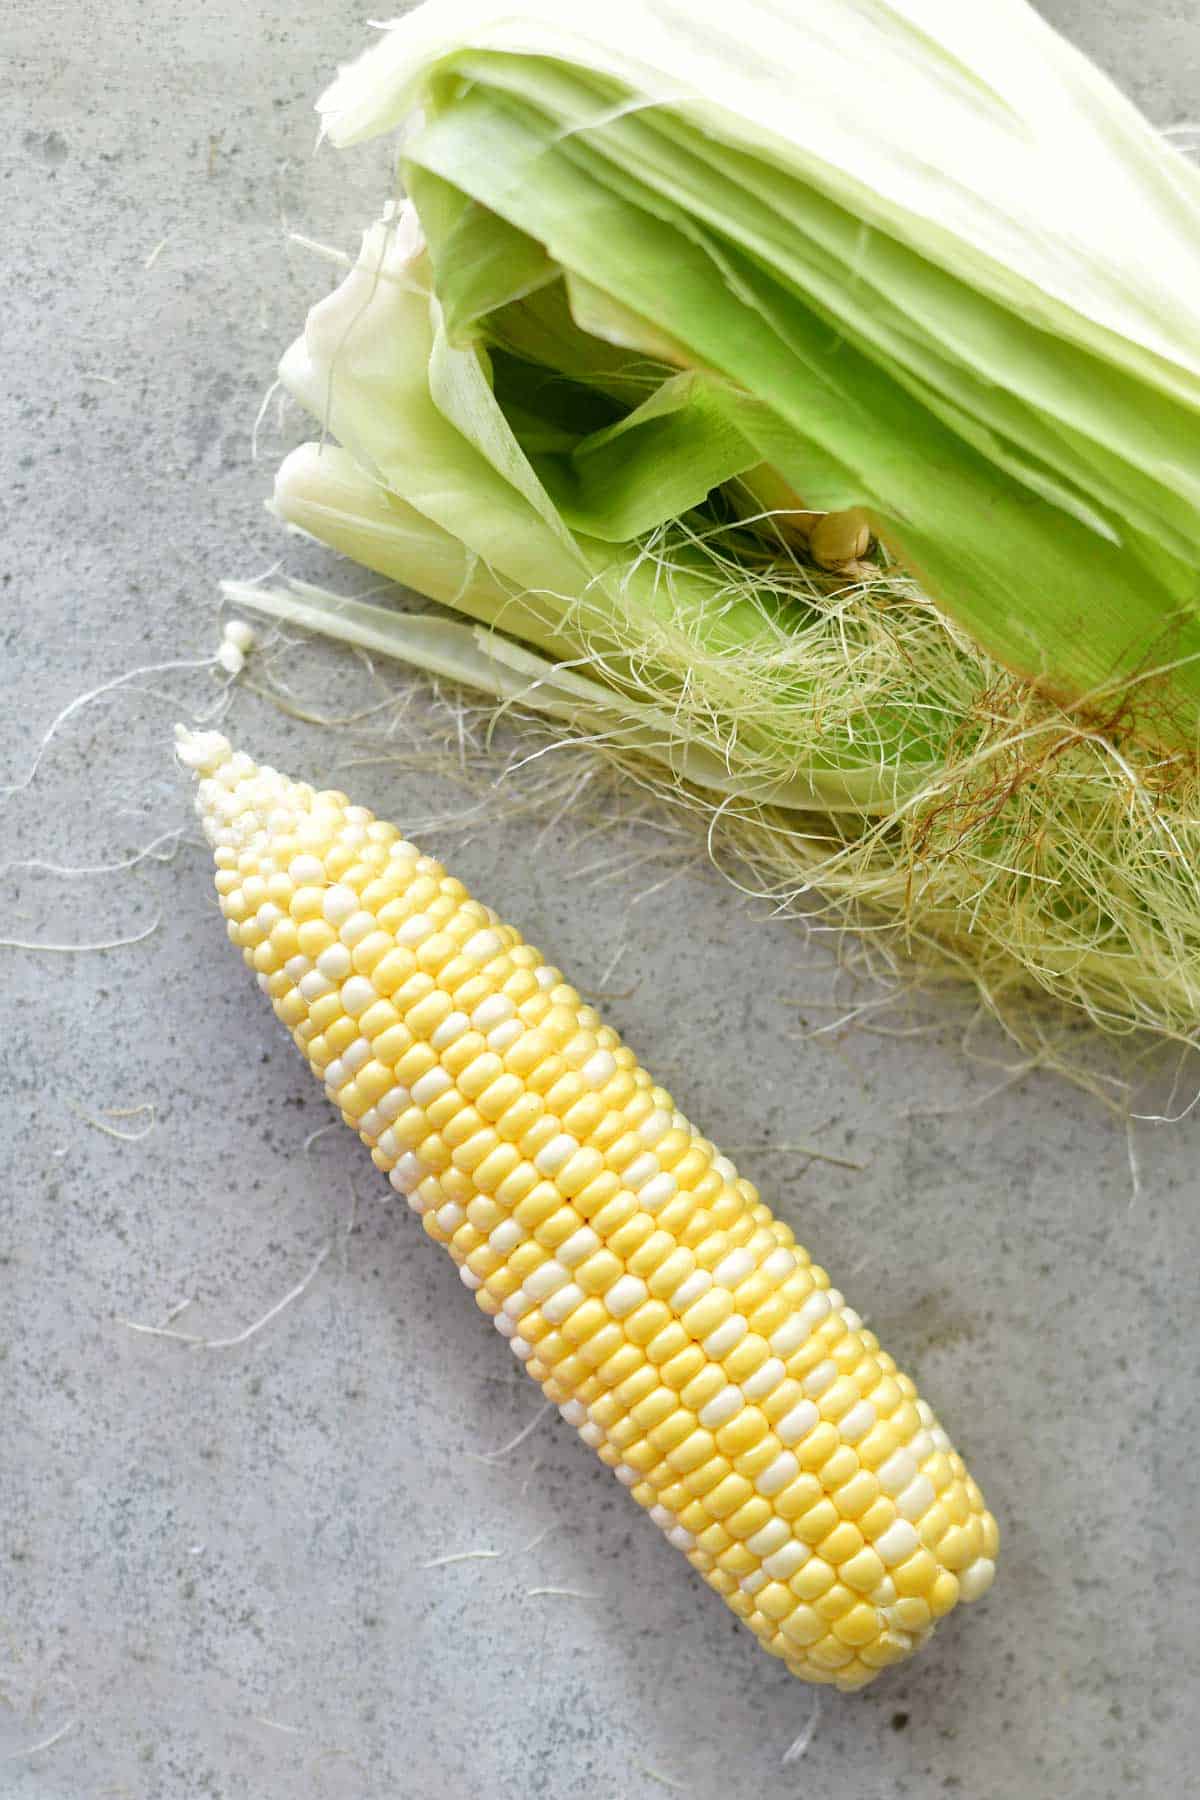
Peel, aka shuck, the corn on the cob and remove the silks. If you don’t like peeling corn on the cob, try grilling it with the husks instead.

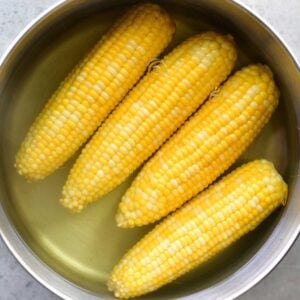
Fill a large stock pot or Dutch oven about half full with water. Bring the water to a boil over medium heat. Add the peeled corn on the cob.

Cover and return to a boil. Cook for 5-7 minutes.

Remove the corn on the cob from the hot water and place on a platter.

One of my favorite tips for buttering sweet corn is to peel an inch or two of the paper off of one end of a cold stick of butter.
Then, hold onto the paper-covered end of the stick of butter and use it to easily butter the corn on the cob.

Frequently Asked
No, do not add salt to the water. The salt can toughen the corn. If you really want to add something, one of my best friend’s dads adds sugar to the water to sweeten the corn a bit more.
When the corn on the cob is fully cooked, the yellow color of the corn is more intense. The kernels are plumper and more tender. You can test it by pricking a kernel with the tip of a sharp knife. But most importantly, the corn needs to be hot. You can use tongs to grab an ear of corn out of the water to check if it is hot.
When making it for large family gatherings, we bring more than one pot of water to a boil and cook the corn in batches. Keep the water boiling so that the next batch of corn on the cob can be added immediately.
When making multiple batches of corn on the cob, place the hot, cooked corn on the cob in a large roasting pan and cover with foil. Place the pan in the oven that has been preheated to 180˚F.
How To Use Leftovers
How To Boil Corn On The Cob
Video
Equipment
Ingredients
- 4 ears corn on the cob
- 4 teaspoon butter
- ⅛ teaspoon salt
Instructions
- Peel the corn on the cob and remove the silks.
- Fill a large stock pot or dutch oven about half full with water. Bring the water to a boil over medium heat.
- Add the peeled corn on the cob. Cover and boil for 5-7 minutes.
- Remove the corn on the cob from the hot water and place on a platter. Serve while hot with butter and salt.


Sarah says
This is my go to corn on the cob recipe. I follow it to the T and always ends up perfect, thank you so much!!!!
Tonia Larson says
Yay!! This is our favorite as well!
Ijaz111 says
very amazing website with lot of information
Bruce says
5-7 minutes??? I find it takes 30-40 mins to boil corn on the cob ! What am I doing wrong ?
Mick Behan says
Another easy, peasy way my family has used to butter corn (especially for a crowd or cookout) is to pour the boiling water after boiling the corn into a container large enough to submerge an ear of corn and add a stick of butter to the container to melt. The melted butter will float on top of the water. Simply dunk the ear of corn and slowly remove. The water drains off and the butter remains on the kernels…season the ear however you like. Another benefit is you can stick the container in the fridge and remove/reuse any leftover butter after it cools and re-hardens.
Heather says
Every summer I forgot how long it takes to boil corn and I go back to this recipe! It turns out perfectly every time
gabe itch says
this corn is so juicy oh my jesus…
Donna Peters says
You are not going to believe this one. Put the entire piece of corn in the microwave husk and all for 4 minutes. Then with a oven mitt or kitchen towel take it out to a cutting board and cut off the end that grew on the plant. Wrap the towel around the corn and slowly squeeze the corn out of the husk. It comes out silk free hot and delicious! Add butter salt is optional and enjoy. Saw this on Tic Toc!
Tonia says
Sounds like a super easy method! Thanks for sharing!
Wayne W says
I’m going to expose the easiest way to butter your corn. We’ve been doing this for over 50 years.
Put the corn holders into the corn, take out a piece of bread, Slather the butter on the bread and simply rotate and slide the corn in the butter. Add more butter as it thins out after a couple of ears and continue till done. Makes it easy to get good butter coverage on the whole ear.
Easy Peasy and no butter running all over the place. Last ear gets to sit on the buttered bread.
Tony says
I just did exactly as you said… Might as well save electricity and the time… Because if I want to eat raw corn that’s what I would do. I like my car a little bit more tender and not so much of the milky moisture that comes out on the cob. But thank you very much for the idea. I am now peeling the rest of my corn and going to cook. Thank you
Judy says
Her method is perfect and you’re being a jerk. If you don’t like it, do it your own way and be quiet about it.
Priscilla Ruth MacDougall says
Thank you. Simple, easy to follow
leo says
perfect
Andrew Thomas says
Brilliant! All the while I’ve been doing it wrong by adding salt to the water n boilin it for 20mins
But with this recipe, first time ever i got a juicy corn! Thanks