• Home
  • About Me
  • Contact

The Gunny Sack

  • Dinner
  • Dessert
  • Slow Cooker
  • Recipe Index
    • All Recipes
    • Appetizer
    • Beverages
    • Breakfast
    • Crock Pot
    • Dessert
    • Dinner
    • Salad
    • Side
    • Soup
    • Snack
    • Holiday
  • Tutorials
    • All Tutorials
    • Mason Jars
    • Homemade Gifts
    • Party Ideas

Home » Dessert » S’mores Bars Recipe

S’mores Bars Recipe

Pin
Share

This post may contain affiliate links to products. If you use those links, I may earn a commission. As an Amazon Associate I earn from qualifying purchases. Learn more here.

Jump to Recipe

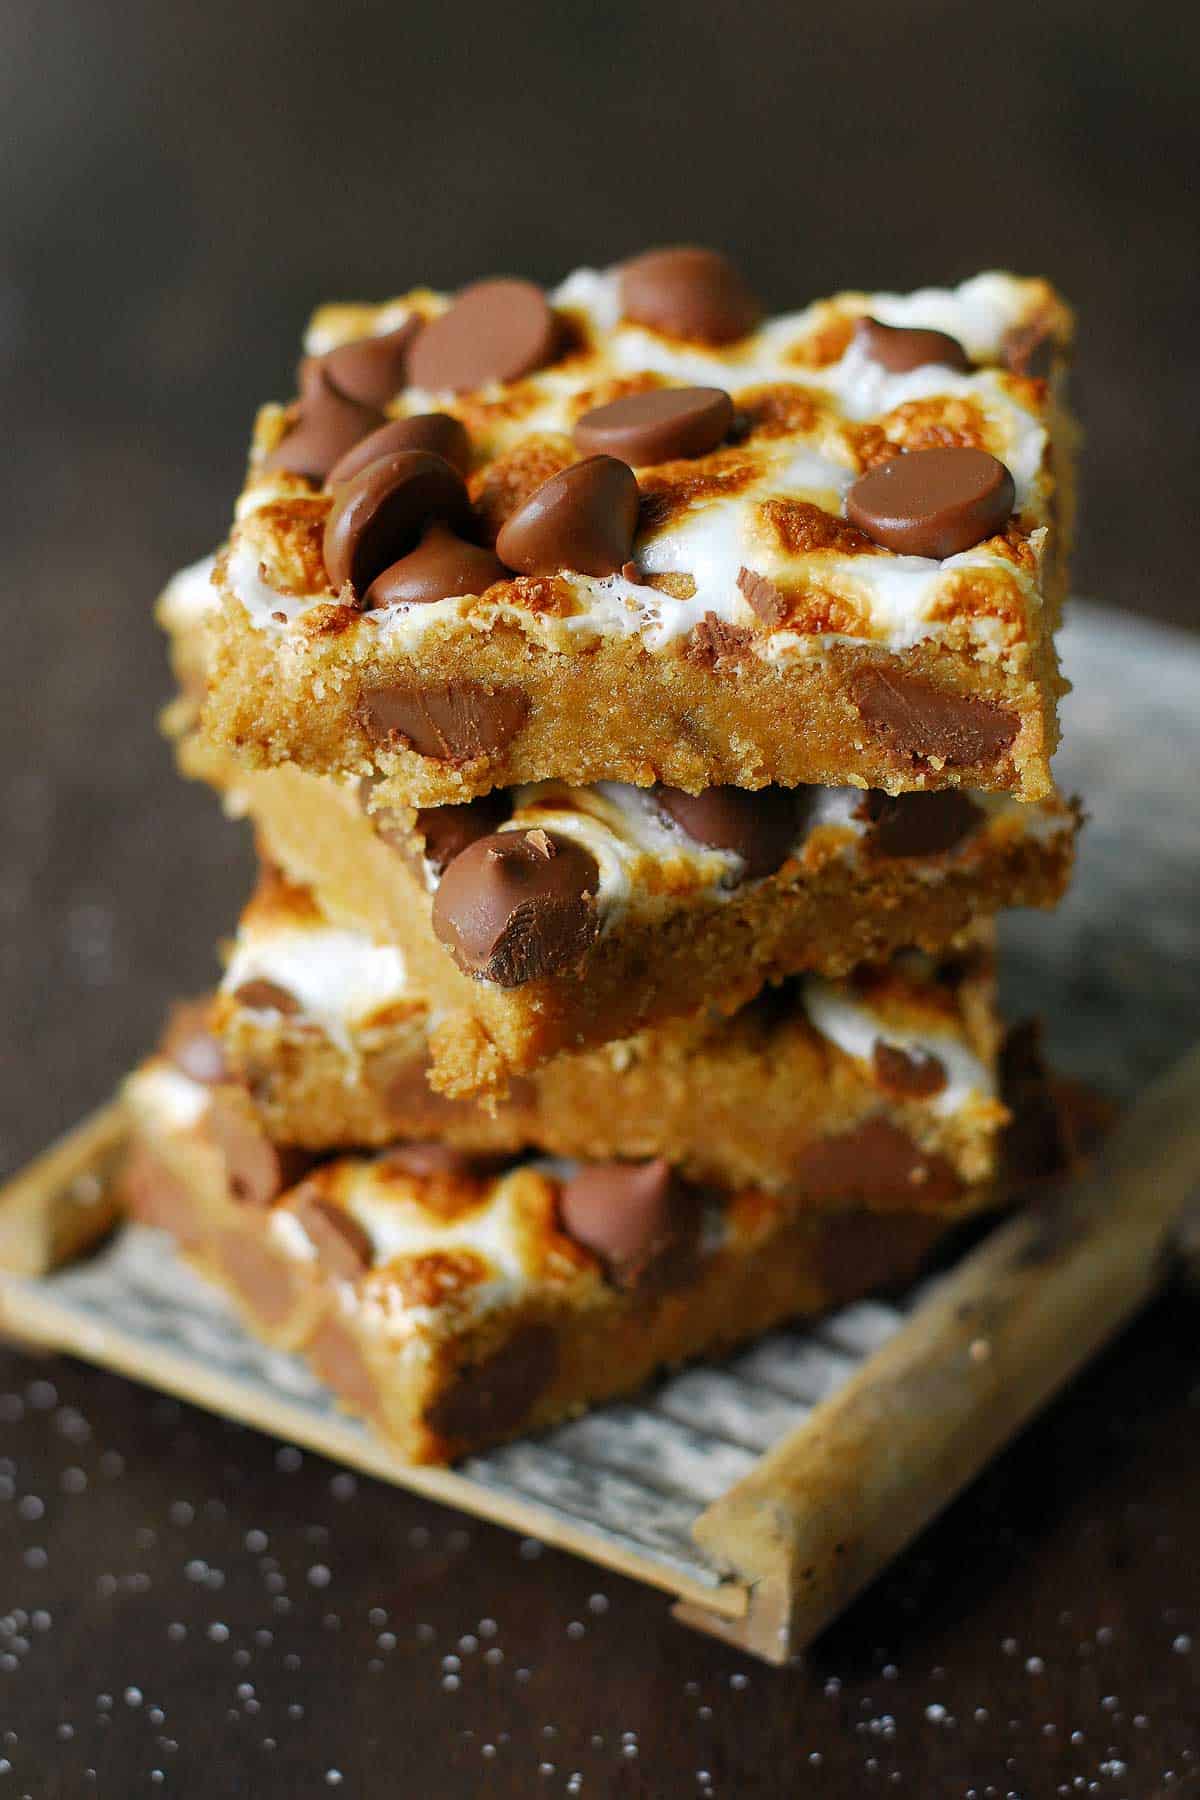
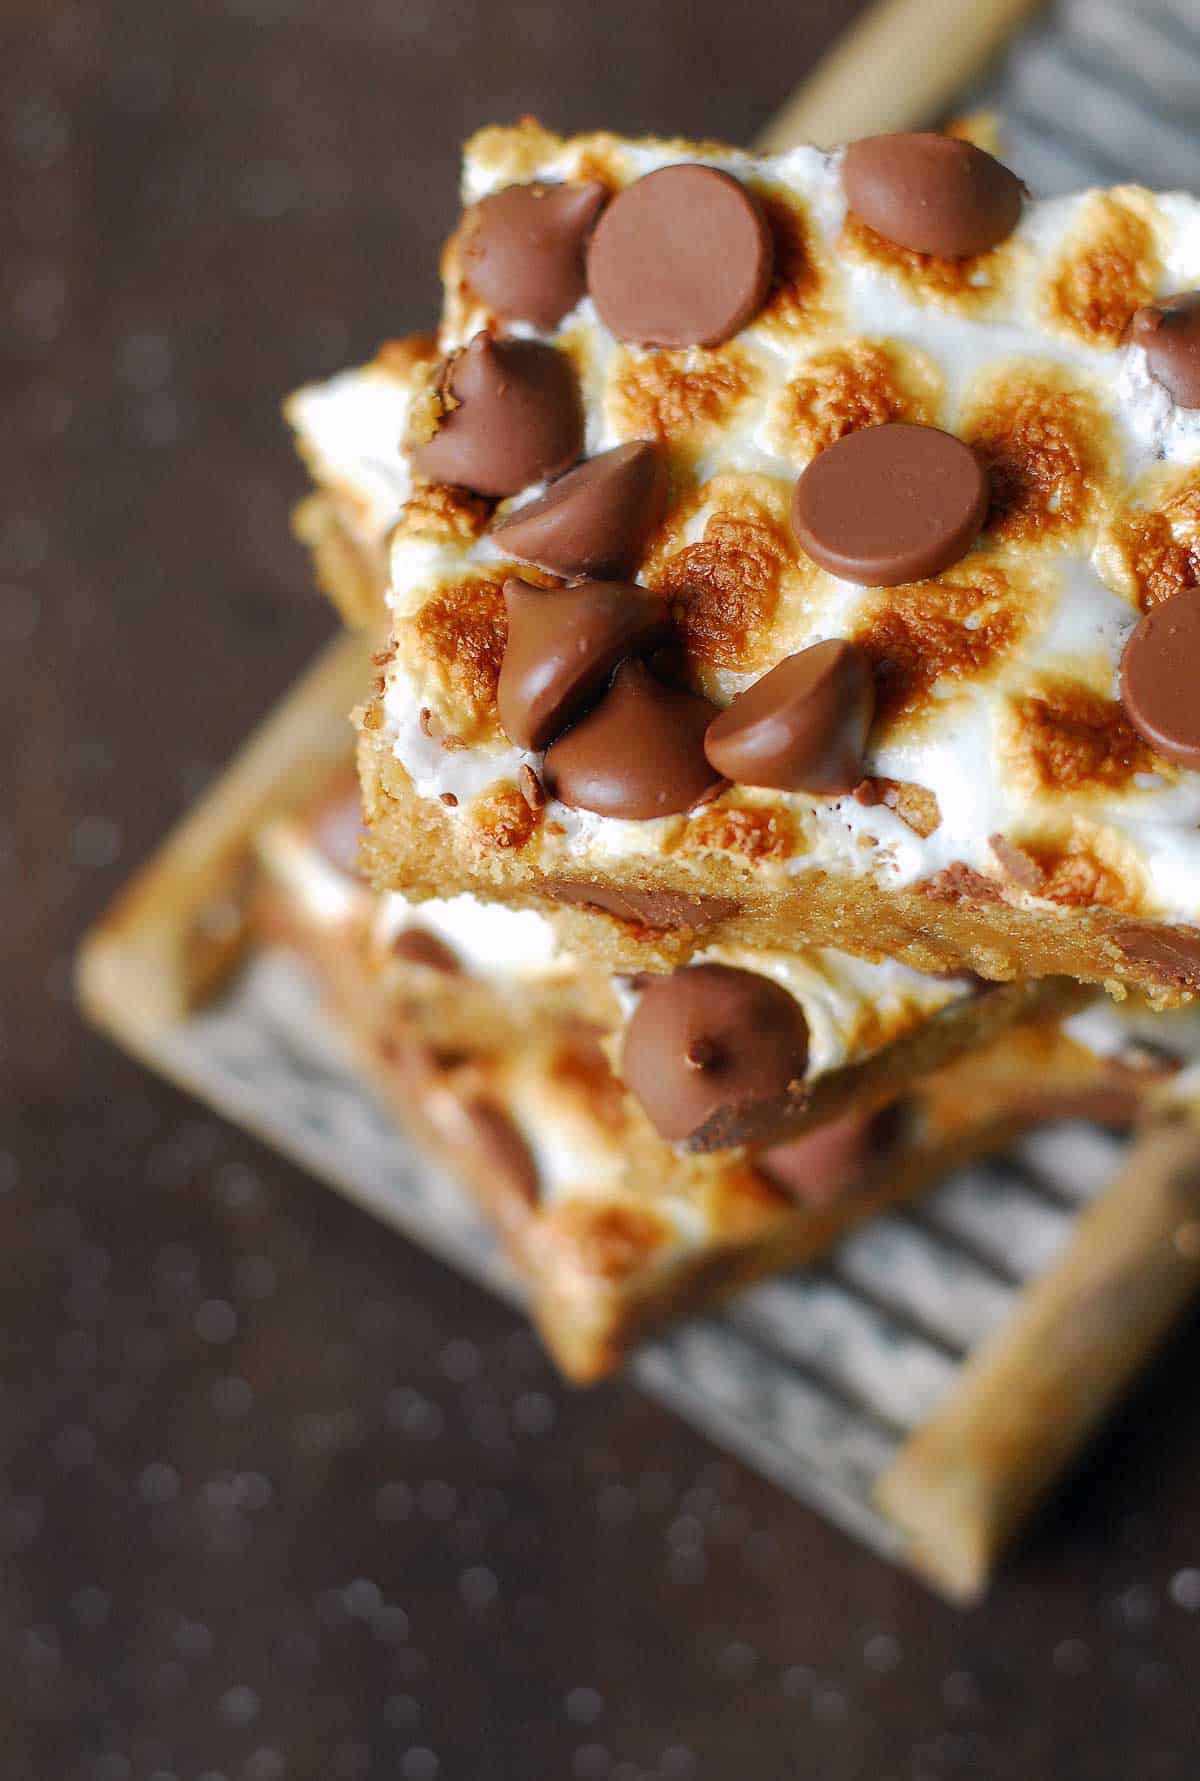
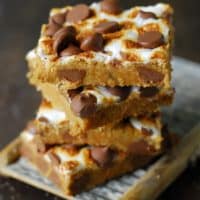
This S’mores Bars recipe has a graham cracker cookie crust topped with toasted marshmallows and Hershey Kisses! Can’t build a bonfire to make s’mores? Make everyone happy with this smores bars recipe instead.

s'mores bars stack

S’mores are one of those things that just scream summer! You know that they can be eaten any time of the year, but who makes s’mores in the middle of February, right?

Actually, I do remember toasting marshmallows over a gas store, with my grandma in her apartment, so you really don’t need a bonfire at all.

And you don’t need a bonfire to make these S’mores Bars that I am sharing with you today! They have a graham cracker cookie bar crust with chocolate and toasted marshmallows on top… and they can definitely be made year round!

Disclaimer: This post contains links to products for making this recipe. If you use those links, I may earn a commission. Learn more here.

S’mores Bars Recipe

graham cracker crumbs in food processor

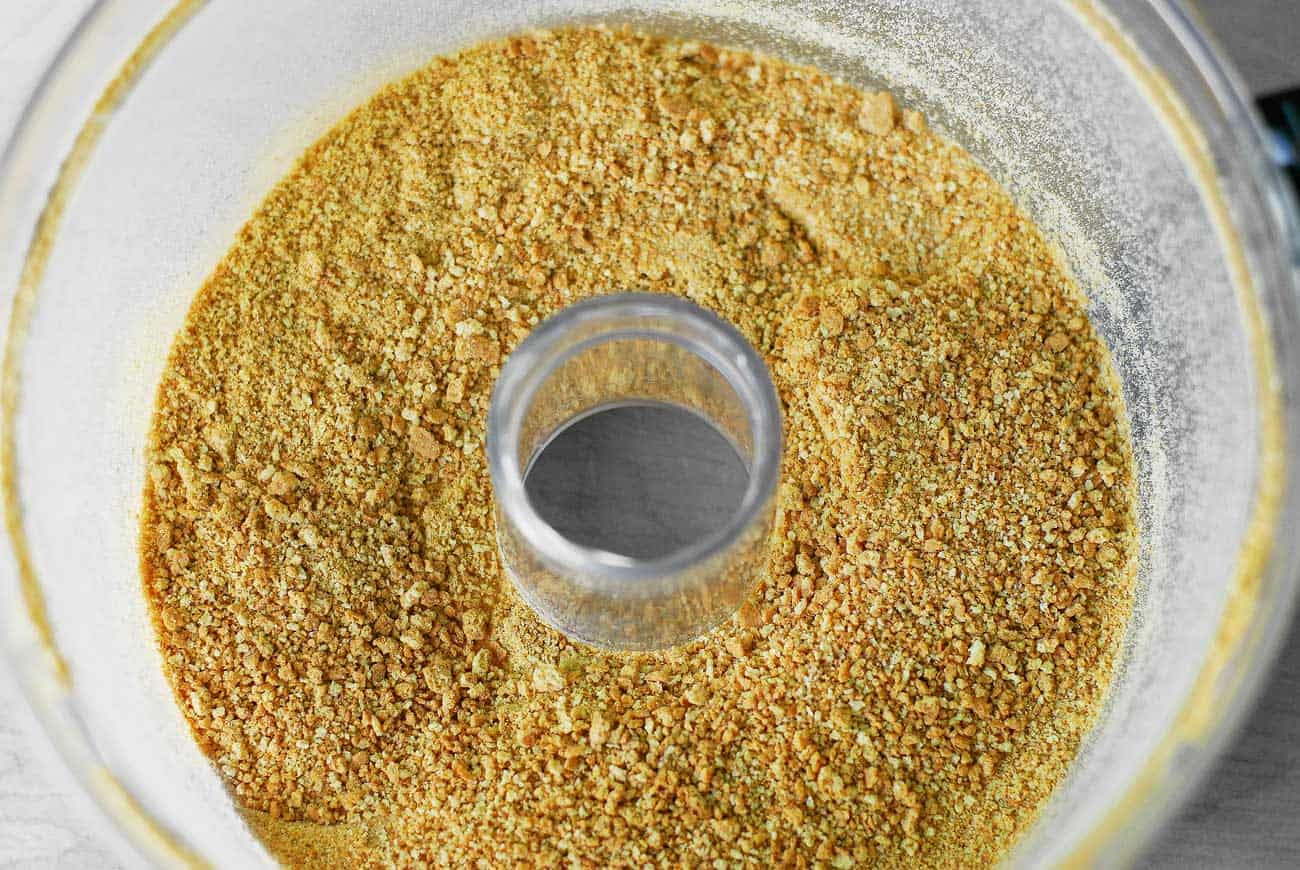
Step One: crush the graham crackers

Start by making 1/2 cup of graham cracker crumbs by chopping or crushing about 5 full graham cracker sheets.

Use a food processor if you have one available.

Crush Graham Crackers in baggie

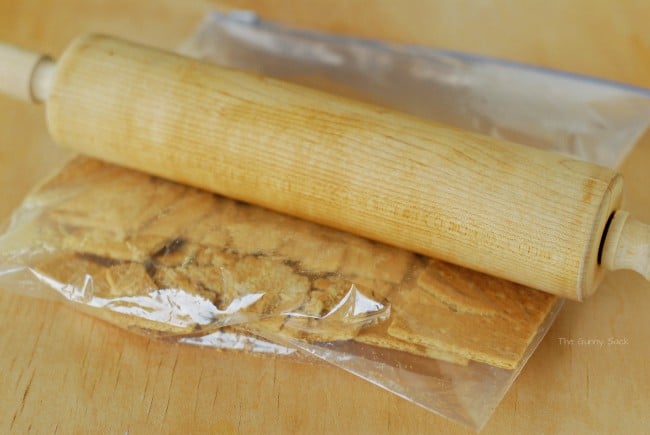
Or put the graham crackers in a gallon sized ziplock bag and crush them with a rolling pin.

Step Two: make the s’mores bars dough

Make the dough.

Mix together the baking soda and water and set it aside.

Cream together shortening, granulated sugar and brown sugar.

Add vanilla, egg and baking soda/water mix.

Gradually beat in flour, graham cracker crumbs and salt.

Mix in 1/2 cup of mini Hershey’s Kisses by hand.

s'mores chocolate chip cookie bars

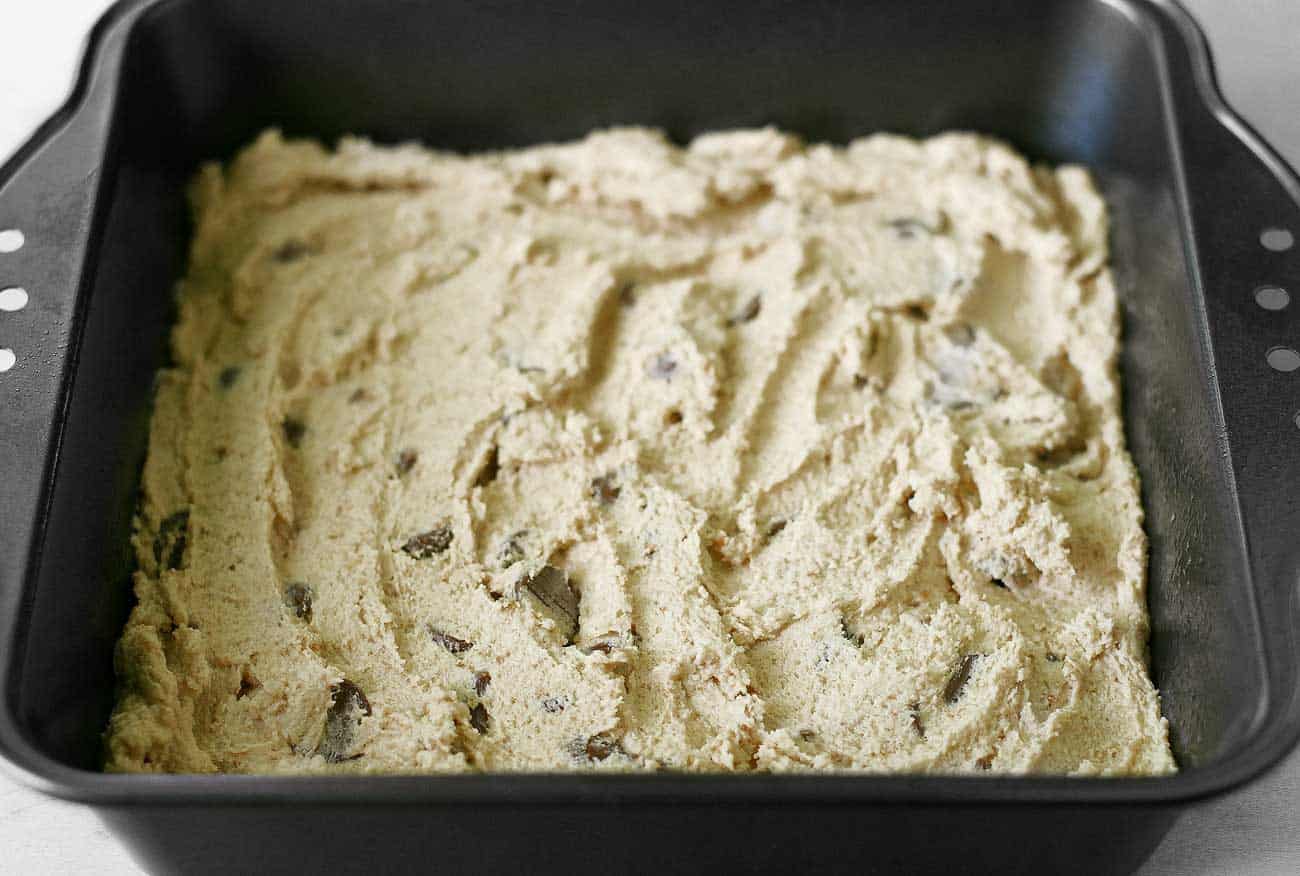
 Spread in a greased 8-inch square pan.

s'mores cookie bars in pan

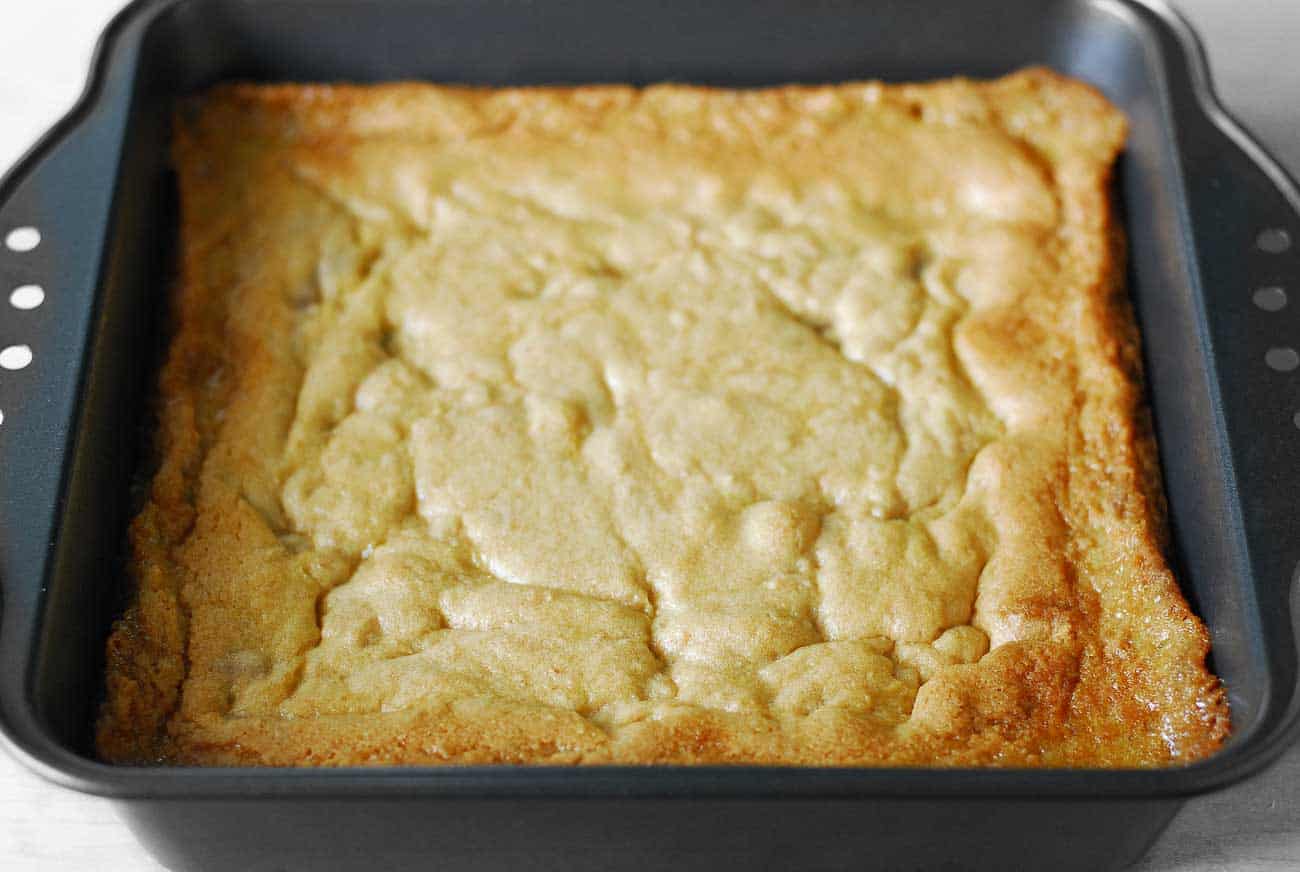
Step Three: bake the s’mores bars

Bake at 350°F for 18-20 minutes, until golden brown.

marshmallow layer

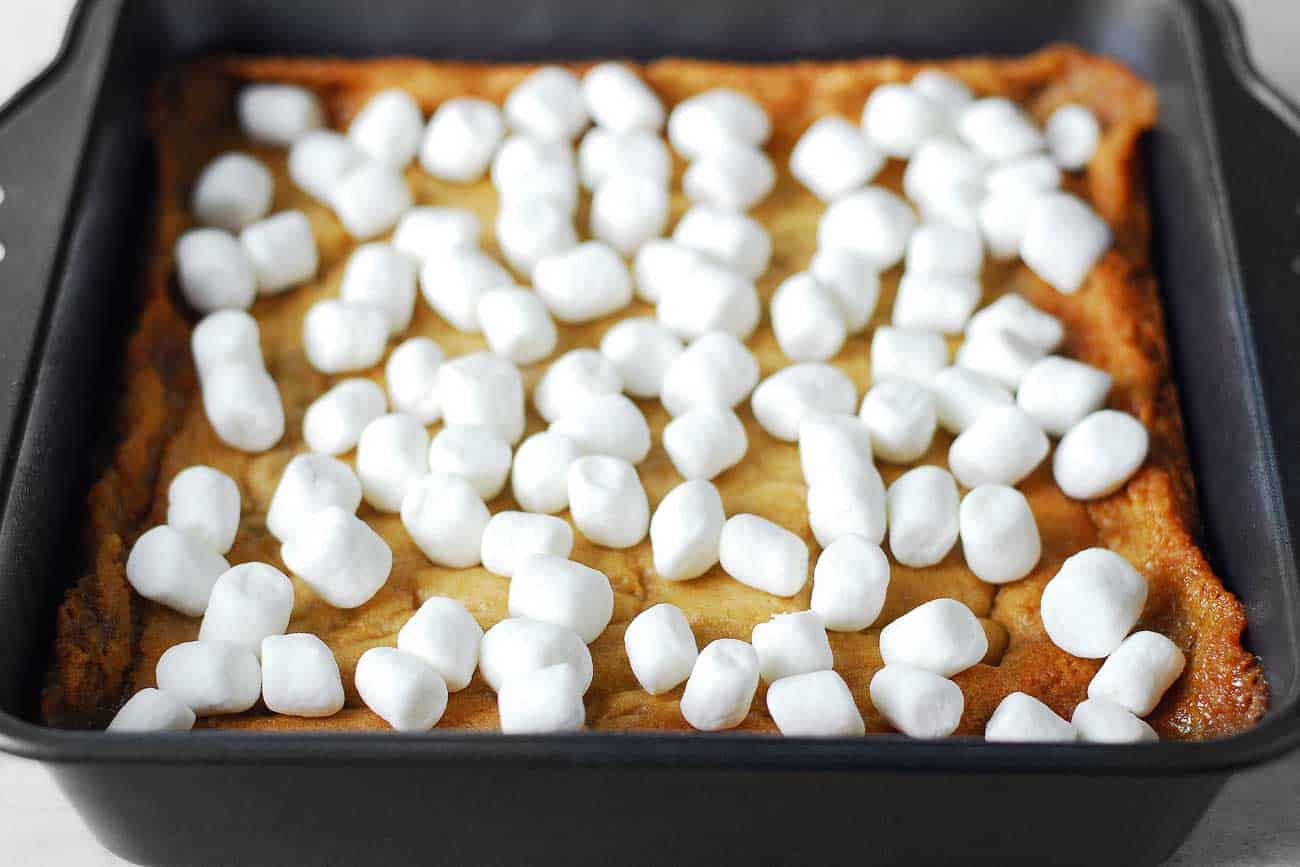
Step Four: add the s’mores bars toppings

Turn the broiler on and top the bars with mini marshmallows.

Place the bars under the broiler for 30-60 seconds to toast the marshmallows.

Watch them carefully because they will burn quickly!!

s'mores bars cookie bar in pan

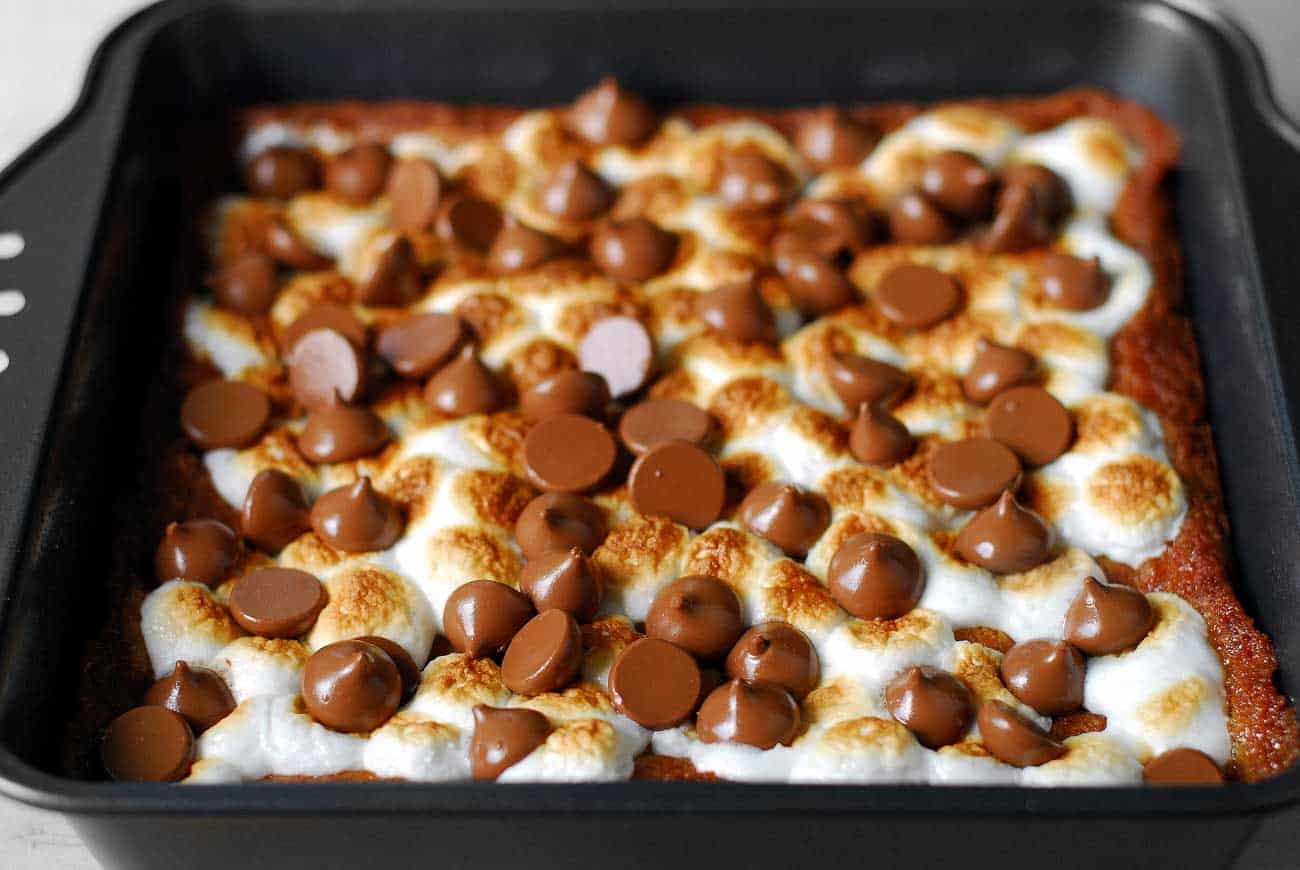
Turn the oven off and sprinkle the bars with more mini Hershey’s Kisses.

Return the pan to the still warm oven for a couple of minutes to melt the Kisses.

easy s'mores bars recipe

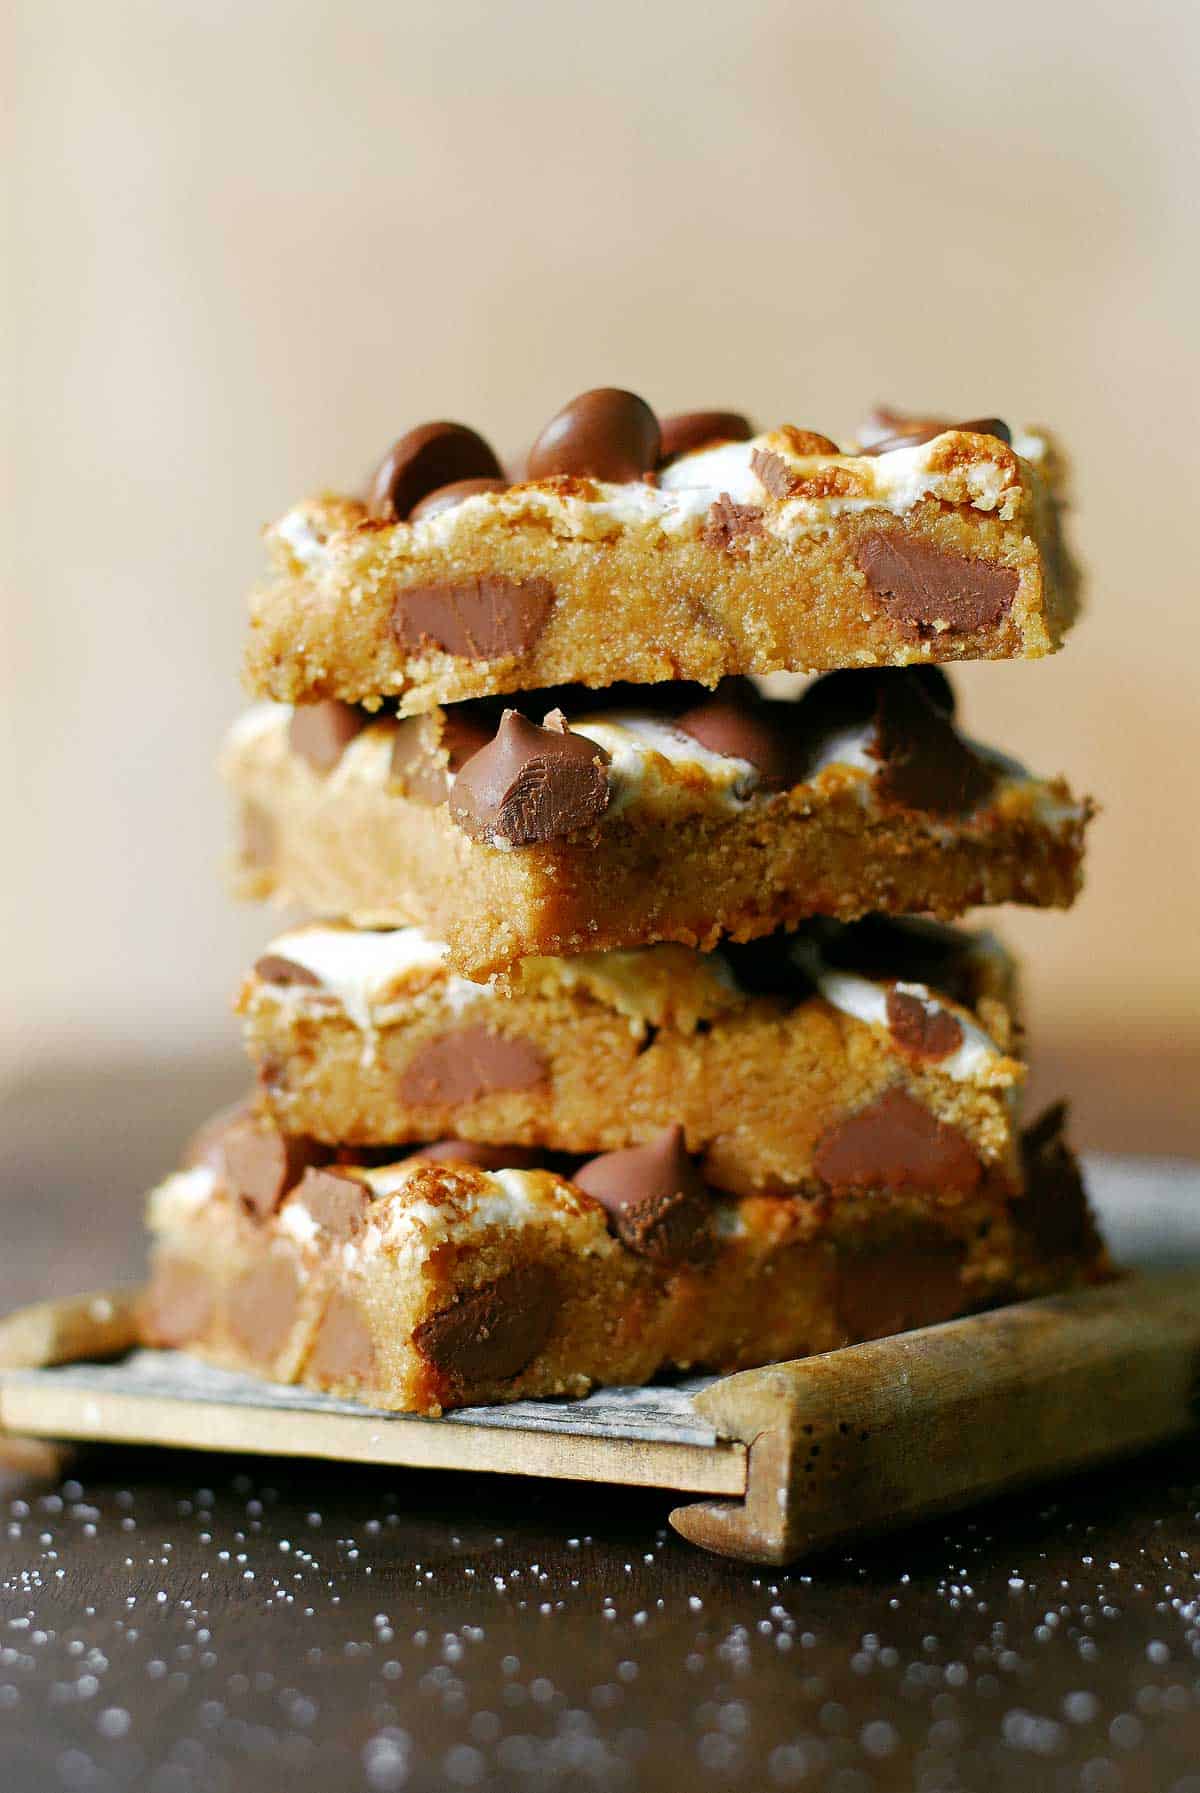
Allow the bars to cool before cutting them.

s'mores bars stack from top

These smores bars are to-die-for! The cookie crust was adapted from these chocolate chip cookie bars which I already love.

The addition of graham crackers, toasted marshmallow and kisses make them all the better. My sister and her husband just bought a house and they are doing a little updating to the house before they move in.

I brought these bars over there to share with everyone who was helping. While I took a brief tour of the house, the bars were devoured!

S’mores Bars Recipe Tips and FAQ

1. What are Hershey’s Mini Kisses?

They are a smaller size of the traditional kisses and come unwrapped for easy baking.

2. Where can you buy Hershey’s Mini Kisses? From Amazon or in the baking department of a grocery store with the chocolate chips. It does appear that they are getting harder and harder to find.

3. Can’t find the mini kisses? I couldn’t find them recently so I used these milk chocolate chips because they are larger in size. You could also use chopped full sized kisses, or cut up Hershey’s bars.

4. Don’t overbake these s’mores bars. The longer they bake the harder and drier they will be.

5. HELP! I burnt the marshmallows. What can I do? Don’t worry this happened to me too. Use a fork to lift the burnt marshmallows off the s’mores bars. Add new mini marshmallows and try toasting them again.

Obsessed with s’mores recipes? Try these next:

S’more Pie Pops by The Gunny Sack:

A s’more is a quintessential summer dessert and this easy S’more Pie Pops recipe captures the goodness of s’mores in a flaky pie crust.

S’mores Cheesecake Fluff Salad by Inside Brucrew Life: Make a big bowl of this S’mores Cheesecake Fluff Salad to take to all your picnics and barbecues this summer. Chocolate, marshmallow, and graham cracker goodness will make it disappear in a hurry.

S’mores Cheesecake by The Gunny Sack: No Bake S’mores Cheesecake is easy to make with creamy chocolate filling, chocolate ganache, a graham cracker crust and toasted marshmallows on top!

Mini S’mores Cheesecakes by Miss In The Kitchen: Easy and delicious Mini S’mores Cheesecakes are going to be the hit of any party or celebration. Creamy vanilla cheesecakes are topped with milk chocolate, toasted marshmallows and graham cracker crumbs for an irresistible treat!

No Bake S’mores Cookie Cups by The Gunny Sack: No Bake S’mores Cookie Cups recipe for irresistible, bite-sized treats that are easy to make and perfect for when you don’t want to turn the oven on.

Continue to Content
Smores Bars

S’mores Bars Recipe

Yield: 16
Prep Time: 12 minutes
Cook Time: 18 minutes
Total Time: 30 minutes

This S'mores Bars recipe has a graham cracker cookie crust topped with toasted marshmallows and Hershey Kisses! Can't build a bonfire to make s'mores? Make everyone happy with this smores bars recipe instead.

Ingredients

  • 1/2 tsp water
  • 1/2 tsp baking soda
  • 1/2 cup shortening
  • 1/3 cup brown sugar, packed
  • 1/3 cup granulated sugar
  • 1/2 tsp vanilla
  • 1 egg
  • 1/2 tsp salt
  • 1/2 cup flour
  • 1/2 cup graham cracker crumbs, 5 sheets
  • 1 cup mini Hershey's Kisses, divided (or use milk chocolate chips or chopped candy bars)
  • 1 cup mini marshmallows

Instructions

  1. Preheat oven to 350 degrees.
  2. Mix baking soda and water. Set aside.
  3. Cream together shortening, granulated sugar and brown sugar.
  4. Add vanilla, egg and baking soda/water mix.
  5. Gradually beat in flour, graham cracker crumbs and salt.
  6. Mix in 1/2 cup of mini Hershey's Kisses by hand.
  7. Spread in a greased 8 inch square pan.
  8. Bake at 350°F for 18-20 minutes.
  9. Remove from oven and turn the broiler on.
  10. Sprinkle mini marshmallows over the bars.
  11. Place under broiler, for 30-60 seconds, to toast marshmallows. Watch carefully because they toast quickly!
  12. Turn oven off and remove the bars.
  13. Sprinkle with 1/2 cup of mini Hershey's Kisses and return to the still warm oven for a couple of minutes to soften Kisses.

Recommended Products

As an Amazon Associate and member of other affiliate programs, I earn from qualifying purchases.

  • Cuisinart HM-90S Power Advantage Plus 9-Speed Handheld Mixer with Storage Case, White
    Cuisinart HM-90S Power Advantage Plus 9-Speed Handheld Mixer with Storage Case, White
  • Wonder Cup Adjustable Measuring Cup (Two Cup Size)
    Wonder Cup Adjustable Measuring Cup (Two Cup Size)
  • Pyrex Glass Mixing Bowl Set (3-Piece Set, Nesting, Microwave and Dishwasher Safe)
    Pyrex Glass Mixing Bowl Set (3-Piece Set, Nesting, Microwave and Dishwasher Safe)
  • Rubbermaid Commercial Spoon-Shaped Spatula, 13 1/2 in, White - Includes one each.
    Rubbermaid Commercial Spoon-Shaped Spatula, 13 1/2 in, White - Includes one each.
Nutrition Information:
Yield: 16 Serving Size: 1 grams
Amount Per Serving: Calories: 131Total Fat: 7gSaturated Fat: 1gUnsaturated Fat: 0gCholesterol: 10mgSodium: 137mgCarbohydrates: 16gSugar: 11gProtein: 1g

Did you make this recipe?

Share a photo and tag us on Instagram @thegunnysack

© The Gunny Sack
Cuisine: American / Category: Dessert
Pin
Share
« Strawberry Cheesecake Dessert
Mexican Street Corn »

Comments

  1. Melissa H says

    August 21, 2020 at 2:00 pm

    Delicious and so easy to make! I used butter as a substitute for shortening. Came out soft, chewy and delicious! Thanks for a great recipe!

    Reply
  2. Dawn says

    October 17, 2016 at 5:37 pm

    Can you double this recipe and still have it turn out the same? I should have checked before starting but it’s still wiggly in middle of pan after 20 minutes

    Reply
    • Tonia says

      October 18, 2016 at 9:20 am

      Hi Dawn! I have not tried doubling it but it should work just fine. They will take at least 5 minutes longer to bake. I hope you enjoyed them!
      ~Tonia

      Reply
  3. Joy says

    May 6, 2016 at 11:26 pm

    I just made these for our Mothers Day 2016 at our church. The theme is “Love you S’more!”. These are exactly what I needed! Thanks so much!!! I topped mine off with the pieces of a Hershey bar instead of kisses. Amazing recipe!

    Reply
  4. Cal says

    July 29, 2015 at 4:46 pm

    my cookie layer rose (lol might not be the best word to describe) so it’s like a cake…not sure why followed the directions to a T it turned into what seemed like a cookie batter but then rose about 1.5 inches…not sure how this is going to taste…or cut…

    Reply
  5. Carrie says

    July 1, 2015 at 8:48 am

    Where can I find the mini Hershey kisses? I want to make them for the holiday weekend but I can’t find them anywhere. Any help would greatly be appreciated!!

    Reply
    • Tonia says

      July 1, 2015 at 9:09 am

      I found them in the baking department of my local grocery store with the chocolate chips. Here is a product locator https://www.thehersheycompany.com/contact-us/locate-hard-to-find-products.aspx Choose baking products and HERSHEY’S Mini Kisses Milk Chocolate Baking Pieces 10 oz and then enter your zip code. If they aren’t available in your area, you could use milk chocolate chips or chopped Hershey’s Kisses. Best of luck!
      ~Tonia

      Reply
      • Carrie says

        July 5, 2015 at 12:23 pm

        I found them….thanks!

        Reply
  6. Nicole says

    June 14, 2015 at 8:22 pm

    I made these and got them to look a lot like your (yay). The main difference I noticed was that the crust was not as moist looking. It was more crumbly rather than smooth once I cut the bars. I didn’t change your recipe a bit and stuck with the recommended cooking time. Any advice?
    I thought they were pretty good either way, but I think they would be amazing if I could get the crust like yours. Thanks for your recipe.

    Reply
  7. Ella Imison says

    October 20, 2014 at 6:43 pm

    It looks yummy!
    Thanks for sharing!

    Reply
  8. Jocelyn says

    October 18, 2014 at 11:39 pm

    These are delicious! I used half shortening and half butter. Thanks for a terrific recipe.

    Reply
  9. Matea says

    September 19, 2014 at 10:02 am

    Definitely could use a few of these bars right now!

    Reply
  10. Isabella says

    September 16, 2014 at 3:36 pm

    I made these today and they look nothing like yours :c But they taste amazing!!

    Reply
    • Tonia says

      September 16, 2014 at 9:33 pm

      Well, that is what is most important! It’s my job to showcase the best piece in the pan from the best angle. I’m glad you enjoyed them!

      Reply
  11. Chanel says

    August 15, 2014 at 1:40 pm

    If/When I make these I may try them without shortening and butter instead. (I try to stay away from shortening). Let me know if you think it would still turn out with the substitution.
    Chanel

    Reply
    • Tonia says

      August 16, 2014 at 8:30 pm

      Hi Chanel,
      I have tried that, but I do think they will turn out. They probably won’t look exactly like mine did, but that is totally fine too! Check out this guide by Handle The Heat to see the difference in cookies (she doesn’t use shortening either) http://www.handletheheat.com/the-ultimate-guide-to-chocolate-chip-cookies-part-2/ Happy Baking!
      ~Tonia

      Reply
      • Chanel says

        September 21, 2014 at 4:57 pm

        Totally appreciate it, Thanks so much.
        Chanel

        Reply
  12. Kristen says

    August 2, 2014 at 11:49 pm

    I made these tonight and they are amazing! Great recipe

    Reply
    • Tonia says

      August 3, 2014 at 10:12 pm

      I’m delighted to hear that! We love them too. Thanks so much for stopping back to let me know that you enjoyed them!

      Reply
  13. Paula says

    July 29, 2014 at 5:15 pm

    Made these for a Back-to-School PTA meeting and they were delicious!!! My husband is not a big sweet eater, and even he was impressed! I couldn’t find mini kisses so I used milk chocolate morsels instead! Will be making these again! Thanks for the recipe!!!

    Reply
    • Tonia says

      July 30, 2014 at 9:01 am

      Fantastic! Thanks for stopping by to let me know. I’ve already made them again since my post went live! 🙂

      Reply
  14. Donna Howard says

    July 29, 2014 at 6:49 am

    Yum – will definitely be making (and pining) these! Oh, are the chips on top mini chocolate chips or mini kisses?? They look like chocolate chips but the recipe says kisses? Either way – total yum!!! (I haven’t been able to find the mini kisses!)

    Reply
    • Tonia says

      July 30, 2014 at 10:08 am

      Yes, they are mini Hershey’s Kisses but yes, you can use milk chocolate chips instead! Happy Baking, Donna!

      Reply
  15. Wendy | Around My Family Table says

    July 28, 2014 at 7:05 pm

    I love the broiler shot where the marshmallows and chocolate are getting toasty!

    Reply
    • Tonia says

      July 30, 2014 at 10:08 am

      Thanks, Wendy! The toasted marshmallows really add flavor!

      Reply
  16. Nicole @ Or Whatever You Do says

    July 23, 2014 at 12:18 pm

    Looks awesome! Loving all the s’mores recipes this week!

    Reply
    • Tonia says

      July 30, 2014 at 10:09 am

      So are we…and it looks like I need to run a few extra miles too! Thanks, Nicole!

      Reply
  17. Julie @ Julie's Eats & Treats says

    July 22, 2014 at 2:26 pm

    Oh Tonia these look to die for! Seriously want to dive into the pan. Pinned!

    Reply
    • Tonia says

      July 23, 2014 at 11:22 am

      Thanks, Julie! They definitely shouldn’t be left laying on the counter.

      Reply
  18. Heather @ French Press says

    July 21, 2014 at 8:44 pm

    Everything you make is drool worthy,, but these bars are really making my stomach growl

    Reply
    • Tonia says

      July 22, 2014 at 11:28 am

      Thanks, Heather!

      Reply
  19. Lindsey @ American Heritage Cooking says

    July 21, 2014 at 6:35 pm

    These are so soft and chewy! I wouldn’t last 10 seconds around these! Yum!

    Reply
    • Tonia says

      July 22, 2014 at 11:28 am

      Thank you, Lindsey!

      Reply
  20. Zainab says

    July 21, 2014 at 6:14 pm

    My my! I will eat the whole pan. These look amazing. The layers are stunning and just perfect 😉

    Reply
    • Tonia says

      July 30, 2014 at 10:11 am

      Thanks, Zainab! I can’t decide which layer is my favorite!

      Reply
  21. Julianne @ Beyond Frosting says

    July 21, 2014 at 3:15 pm

    Oh man, I want to take a giant bite of these!

    Reply
    • Tonia says

      July 30, 2014 at 10:10 am

      I wish I could send some to you! Thanks, Julianne!

      Reply
  22. Kathi @ Deliciously Yum! says

    July 21, 2014 at 8:39 am

    The only thing better than s’mores might be these bars! They look beyond scrumptious and like absolute perfection. Mmmmmm!!!

    Reply
    • Tonia says

      July 22, 2014 at 11:29 am

      I agree! Thanks, Kathi!

      Reply

Leave a Reply Cancel reply

You have to agree to the comment policy.

Tonia LarsonHi, I'm Tonia, a lover of food and photography! Fill a gunny sack with ingredients, tie on an apron and let's get cooking!
  • Facebook
  • Instagram
  • Pinterest
  • Twitter
sign up for emails button
Disclosure | Privacy Policy | Nutrition Disclaimer

Categories

Blog Archives

Copyright © 2021 · Tasteful theme by Restored 316

Copyright © 2021 ·Tasteful Theme · Genesis Framework by StudioPress · WordPress · Log in