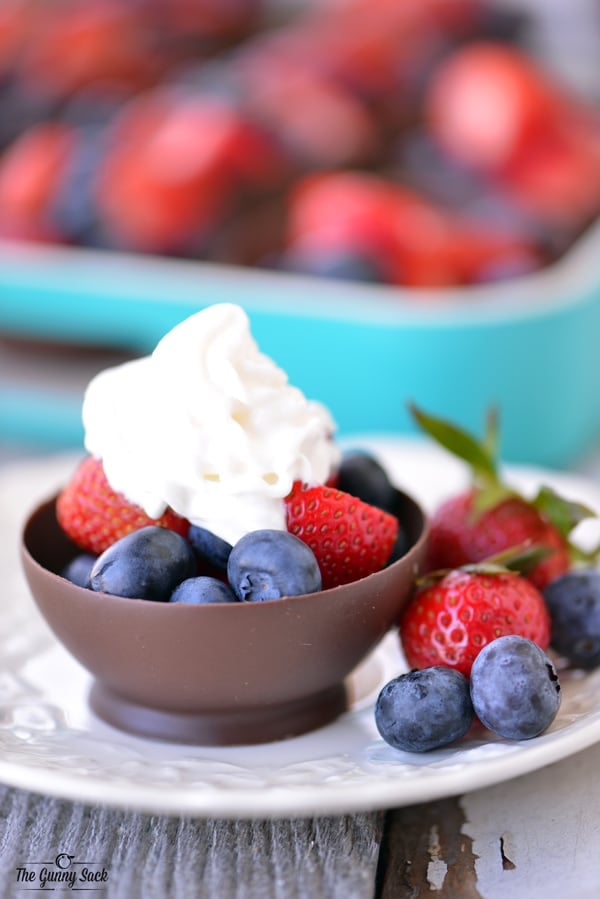
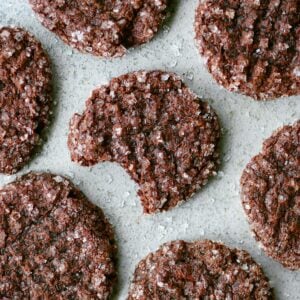
These Chocolate Dessert Bowls are made by dipping balloons in chocolate! The recipe is easy to follow and chocolate bowls can be filled with fresh fruit. Sponsored post for Socialstars. #TargetCrowd
Spring, oh glorious spring! The weather we’ve been waiting for all though the long, cold winter has finally arrived. During the past week, we met friends at the park, played tennis a couple of times and went for several walks. My kids have spent more time outside, than in the house.
We are enjoying every minute of it! Along with the nice weather comes fun spring celebrations. Today, I am excited to show you how to make chocolate dessert bowls filled with fresh fruit that would perfect for serving at a spring brunch.
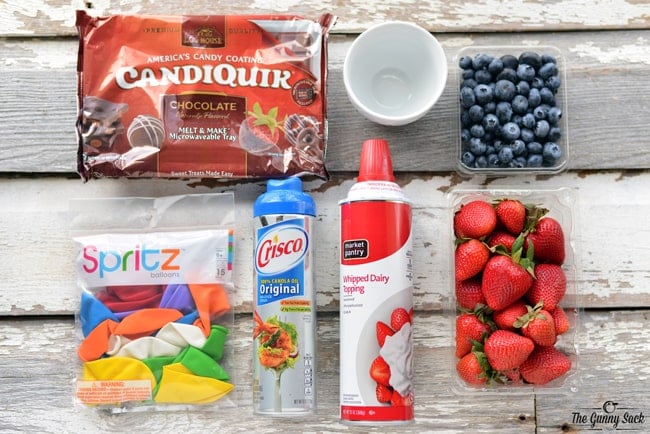
I saw this Behind the Pin: #Adorabowl video from Target and knew I had to try to make the chocolate bowls. I found all of the ingredients at Target Grocery. I shop at Target at least once a week because I love how easy it is to get everything I need in one place and I like knowing that I am getting a great value.
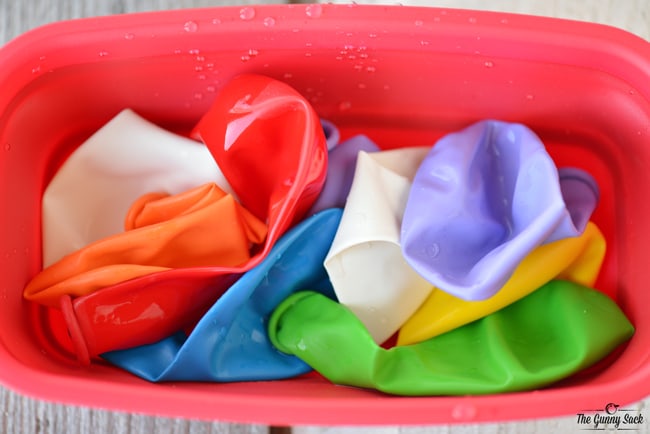
To make the chocolate dessert bowls, first wash and dry the Spritz balloons. I tried making the chocolate bowls with both water balloons and regular balloons. I found that the regular balloons worked better for me because they were easier to remove from hardened chocolate.
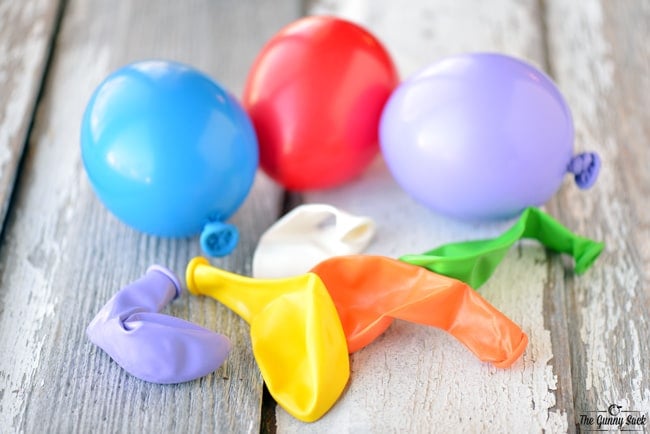
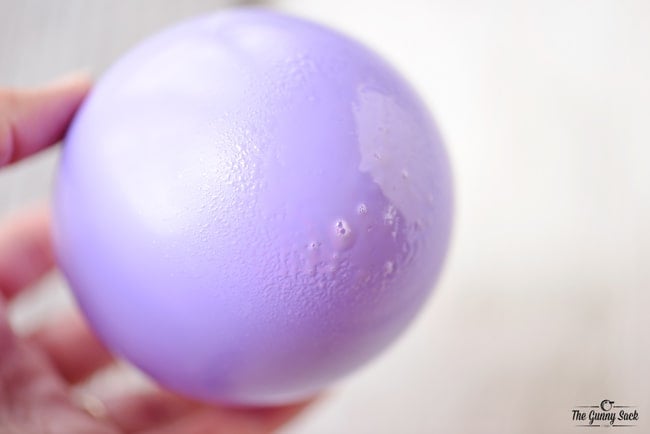
Blow up 12 balloons (or as many as you want), making sure they fit into the bowl you will be dipping them in. To make the balloons rounder on the bottom, I first blew them up so that they were large and then slowly let the air out until they were the size I wanted them to be. I squished and squeezed the air around, to help shape the balloons, before tying the top.
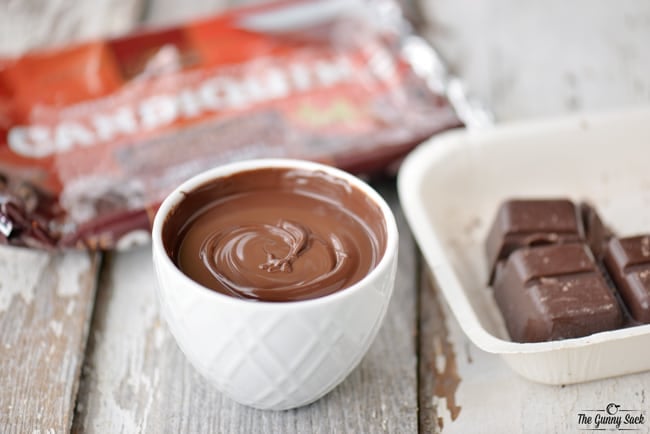
Next, melt the chocolate CandiQuik in a small bowl. Melt as much chocolate as will fit into the bowl and melt more as needed. I found this super cute dip bowl at Target and since it is microwave safe, I used it for melting the chocolate and dipping the balloons.
Spray the bottom of a balloon with a little cooking spray. This step is optional, but I found that it was easier to remove the balloons once the chocolate hardened. One thing I noticed is that the cooking spray left small spots in the bottom of the chocolate bowls (see picture below). Since the bowls are filled with fruit, it didn’t matter to me, but I wanted to give you a heads up.
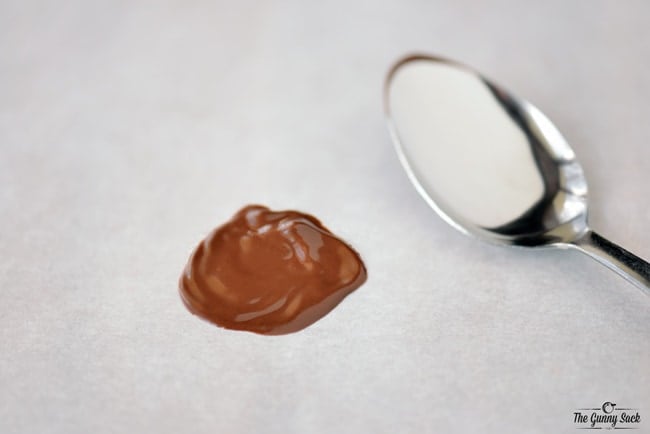
Use the back of a spoon to make small circles of chocolate on a piece of parchment paper. This will help form the base of the chocolate bowls.
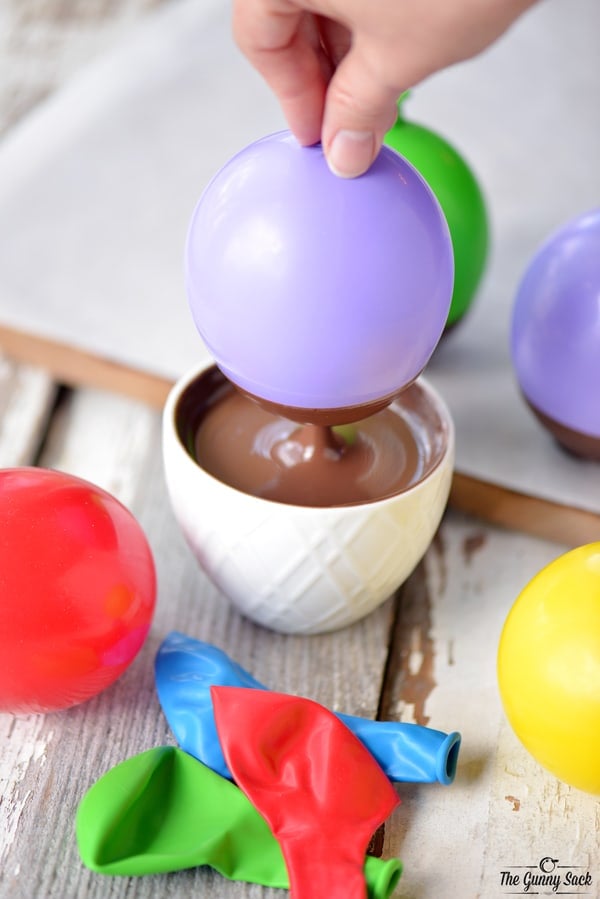
Dip the balloons in the melted chocolate and set them on the chocolate circles on the parchment paper.
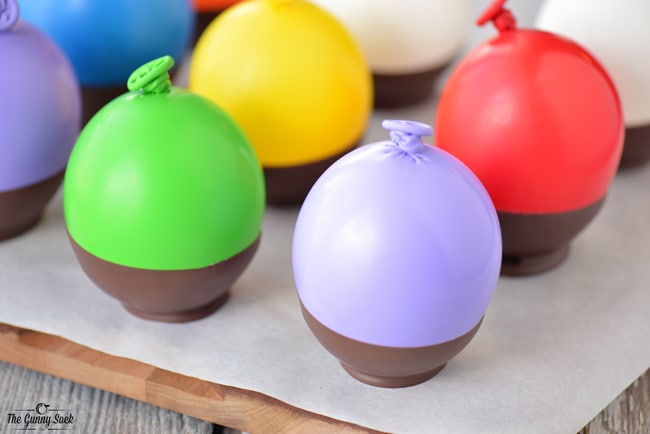
Allow the chocolate to harden for at least one hour. Then, melt more chocolate and re-dip the balloons. Re-dipping the balloons helped to make the chocolate bowls more sturdy and less likely to break.
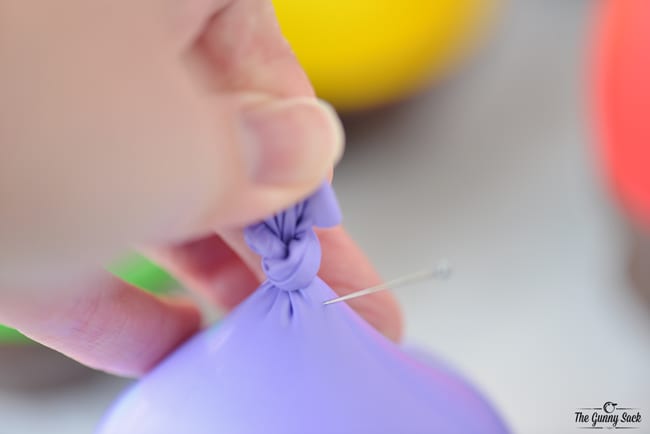
Allow the chocolate to harden for at least one hour. Then, s-l-o-w-l-y let some of the air out of the balloons. Start by pulling up on the knot, use a pin to poke a hole near the knot and let some of the air out of the balloon. If you pop the balloon quickly, some of the chocolate bowls may break.
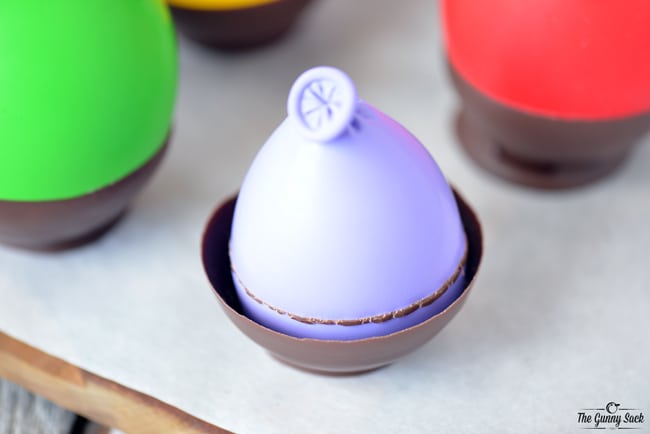
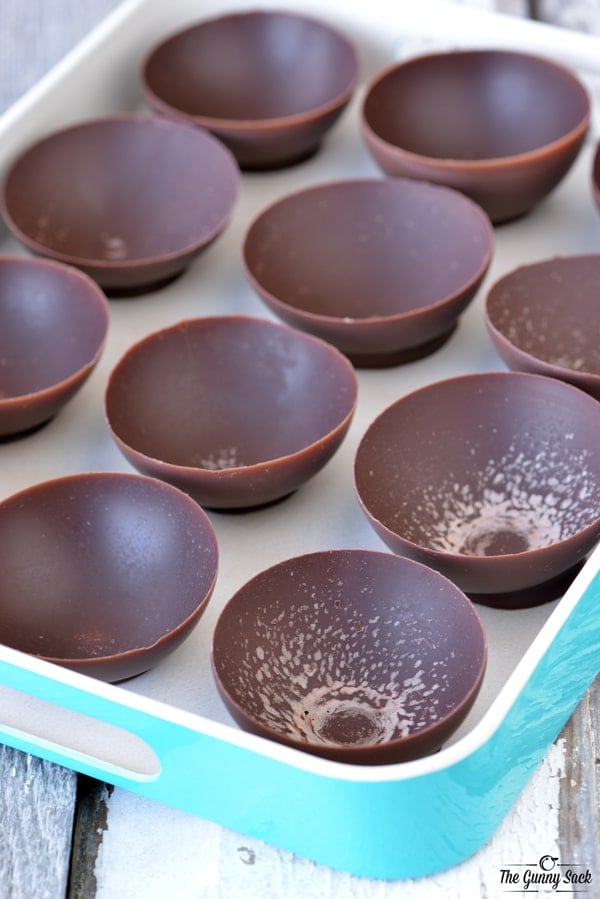
With the balloon slightly deflated, carefully pull the balloon away from the chocolate bowl. Remove more air if needed and then completely remove the balloon.
(Here you can see the spots from the cooking spray in some of the chocolate bowls.)
Put the chocolate bowls on a tray. I found this pretty serving tray at Target. It is perfect for spring and Target is the perfect place for picking up everything you need for spring entertaining.
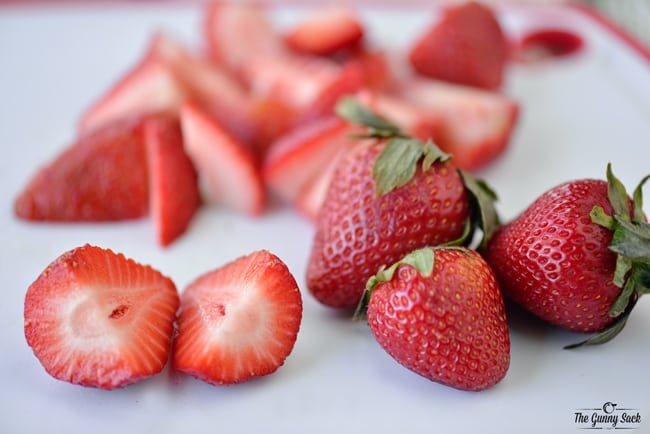
Fruit is an essential ingredient for so many spring brunch ideas from main dishes to desserts. It is ideal for filling the chocolate bowls. The bright colors look pretty on display and the chocolate tastes great with both the strawberries and the blueberries. Once the chocolate bowls are ready to be filled, wash the strawberries and blueberries. Then, slice the larger strawberries into smaller pieces.
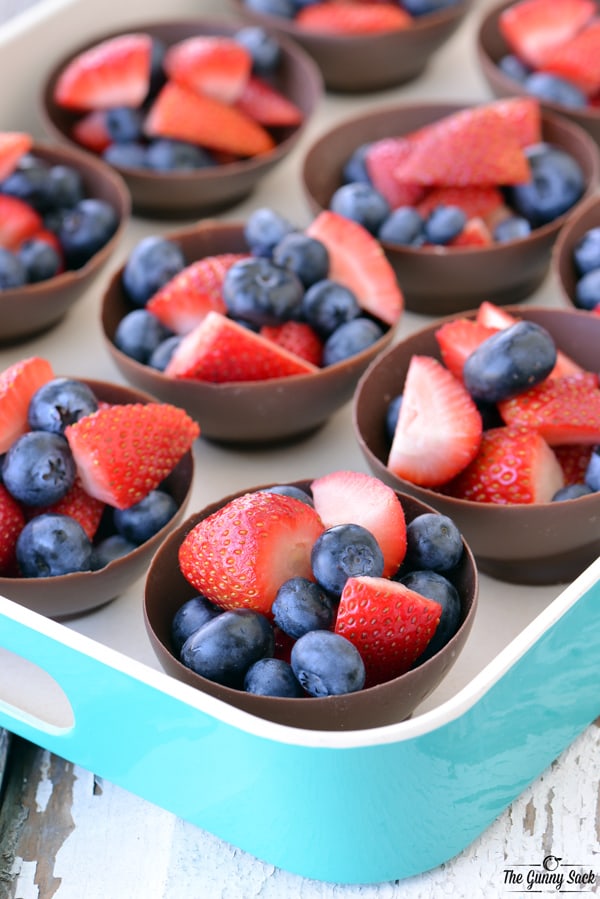
Fill the bowls with the blueberries and strawberries.
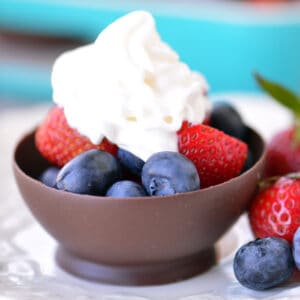
Before serving, top the fruit with Market Pantry Whipped Cream. I am delighted with how these chocolate bowls turned out. I made a double batch of these mini fruit bowls and we shared them at a spring celebration last weekend. Everyone loved them, from the little kids to adults, and I even noticed several people go back for a second chocolate dessert bowl filled with fruit! The red, white and blue in this dessert, would make these perfect for 4th of July as well.
Chocolate Dessert Bowls
Equipment
Ingredients
- 16 ounces chocolate almond bark I used Chocolate CandiQuik
- cooking spray
- 1 pound strawberries
- 1 pint blueberries
- 12 tablespoon whipped cream
Instructions
- Wash and dry the balloons.
- Blow up 12 balloons so that they will fit into the dipping bowl.
- Melt the chocolate CandiQuik in a small dipping bowl.
- Spray the bottom of a balloon with a little cooking spray.
- Use the back of a spoon to make a small circle of chocolate on a piece of parchment paper.
- Dip the balloons in the melted chocolate and set them on the chocolate circles on the parchment paper.
- Allow the chocolate to harden for at least one hour.
- Melt more chocolate CandiQuik and re-dip the chocolate bowls.
- Allow the chocolate to harden for at least one hour.
- S-l-o-w-l-y let some of the air out of the balloons.
- Carefully pull the balloon away from the chocolate bowl.
- Wash the strawberries and blueberries. Slice the larger strawberries into smaller pieces.
- Fill the chocolate bowls with the blueberries and strawberries.
- Before serving, top the fruit with whipped cream.


Myrtice Stevens says
Perfect healthy dessert bowls! Absolutely it!!!
Olivia says
Question all the way from Australia: Substitution for Candiquik? Australian equivalent?
Tonia says
Greetings from America! I believe the Australian equivalent to Candiquik is called compound chocolate buttons or candy melts. Best of luck! ~Tonia
Erica says
Most chocolate shops or baker’s supply stores (and some grocery stores) have melting chocolate of different forms, and these should work just fine. (and in my opinion are better than candiquick because the chocolate tends to be fresher)
Harriet Emily says
What a beautiful looking dessert – and such a brilliant, creative idea! I can’t wait to try this 🙂
Andi @ The Weary Chef says
These are so cute! I love the way they have a little base on the bottom. I thought you poured them into a mold or something, but it’s impressive how that happens on its own. Great party trick, Tonia! 🙂
Jessica @ A Kitchen Addiction says
What a fun idea!
Rhonda says
Wow, these are so cool. I would have never thought to do this. I love it!
Heather | girlichef says
I’m gonna say it again – these are awesome and tons of fun! When I saw the pic on FB, I thought you actually dipped a bowl somehow, but I love the actual method…that base is so cool. I am totally making these and filling ’em high w/ fruit and berries. And YES to target! 🙂
Amy @ A Healthy Life For Me says
So darn clever! Love it!
Sara @ Bitz & Giggles says
These are so cute, Tonia! I made little chick egg shells this Easter using a similar technique! I love the addition of fruit!
Joanie @ ZagLeft says
This is the coolest idea for a party. For our end of school party, I’m going to give these a try. Pinned!
Lisa @ Wine & Glue says
These are absolutely stunning Tonia!
Becky | The Cookie Rookie says
I cannot wait to make these! These are awesome!
Courtney @ NeighborFood says
This looks so fun to make! And maybe even more fun to eat. Berries, cream, and chocolate is pretty much my ultimate summer dessert.
Liz says
Wow, you executed these perfectly! What a terrific way to highlight the summer’s fruit!
Ashley | Spoonful of Flavor says
Chocolate and berries is the best combination and these little bowls are so cute! Thanks for the tutorial. I never would have thought to use balloons to make the bowls!
Kacey @ The Cookie Writer says
I have always wanted to try this method but afraid it would fail! My daughter is right beside me as I read through your post and she is asking for balloons and chocolate now!
Carolyn says
These are so awesome, I may try it with some of my low carb ingredients sometime!
Tonia says
Thank Carolyn! You really should!
Jen @ Baked by an Introver says
These little bowls are adorable. Such a fun idea!
Martha @ A Family Feast says
Great job Tonia!! You’ve made it look so easy – I’m totally doing this for our next party!
Tonia says
Thanks Martha! Everyone at the party was impressed!
Erin @ The Spiffy Cookie says
Oh my god this is too awesome
Tonia says
Thanks so much Erin!