This Bloomin’ Garlic Cheese Biscuits recipe is sure to be a family favorite. This cheesy pull apart bread can be an appetizer, game day snack or side dish.
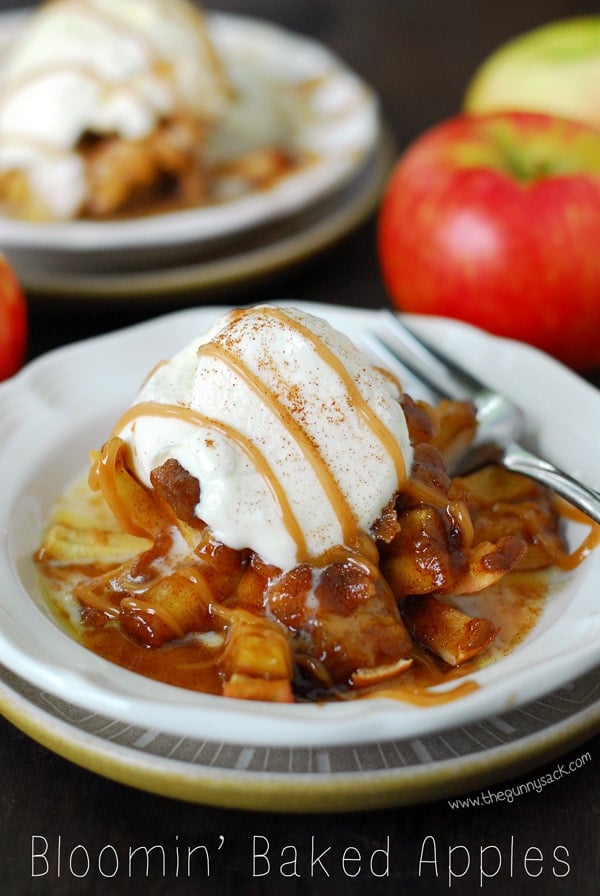
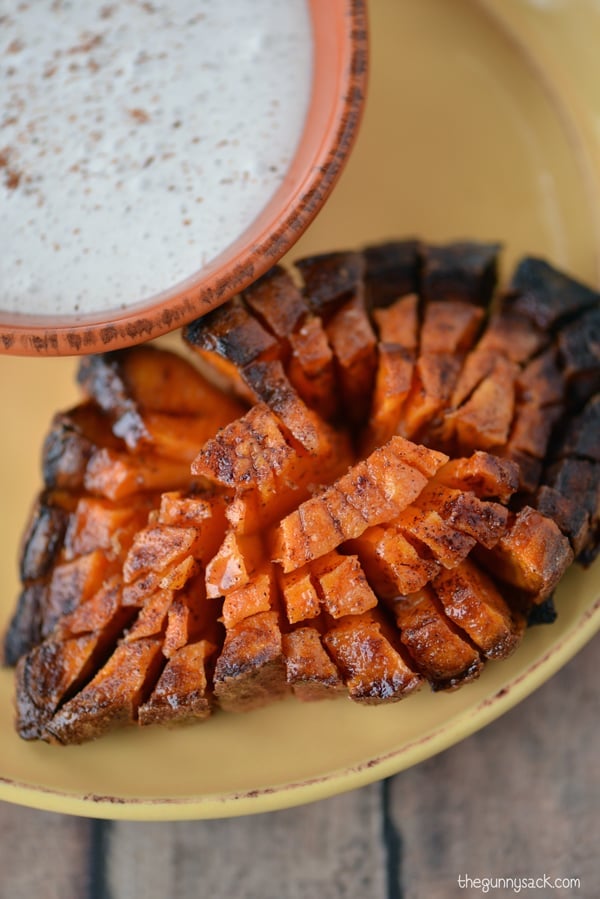
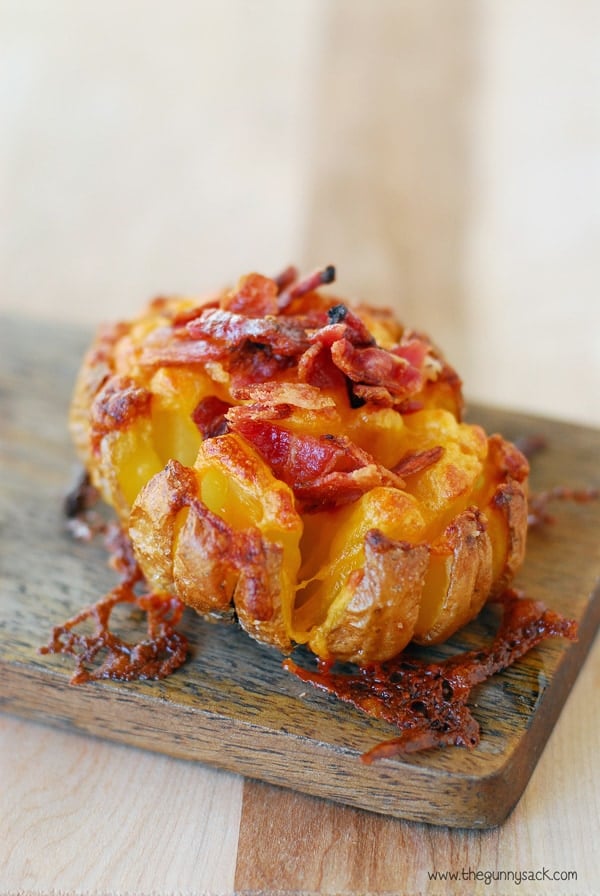
It’s time for another bloomin’ recipe! It all started with the bloomin’ baked apples which are popular with my family and with all of you. Next, I made the bloomin’ baked potatoes and they are my son’s favorite. Then, I made bloomin’ sweet potatoes, which I love!
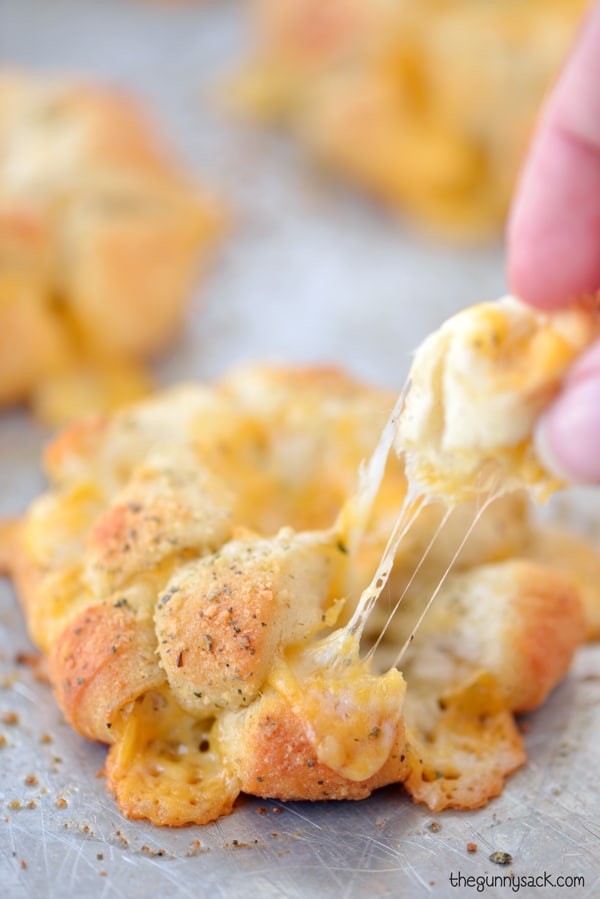
So, I wanted to make another bloomin’ recipe and once again turned to two of my family’s favorite things: cheese and garlic! This Bloomin’ Garlic Cheese Biscuits recipe reminds me of cheesy pull-apart bread or monkey bread. Everyone loved them and were disappointed that the recipe only made ten blooming cheese biscuits!
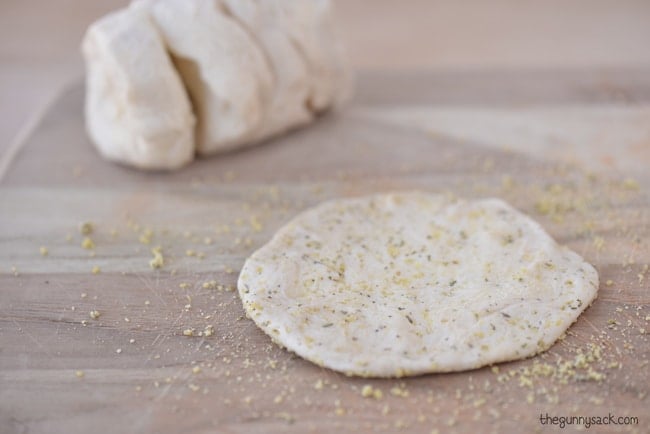
For this recipe, I used ready-made, refrigerated biscuit dough because it made things super easy. (I used Pillsbury Grands Jr. Buttermilk Flaky Layers Biscuits.) Flatten the biscuits and sprinkle them with a parmesan cheese, garlic, parsley and oregano. (I used Mama Francesca Parmesan & Garlic, a premixed blend in a shaker…again, to make things easier.)
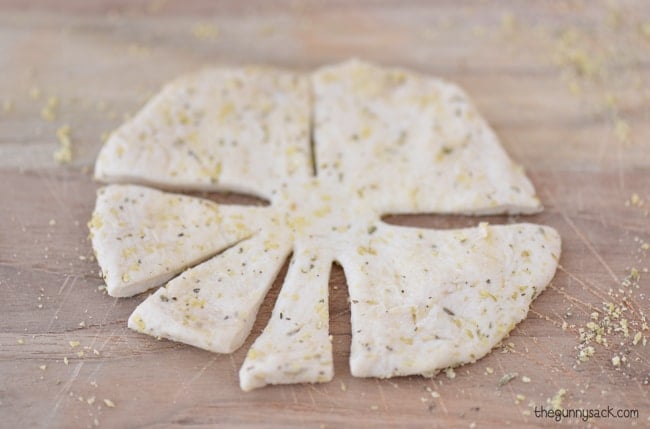
Make 4 slits in the biscuit one at the top, one at the bottom and one on each side. Then, cut two slits in each segment, so you end up with 12 segments of dough.
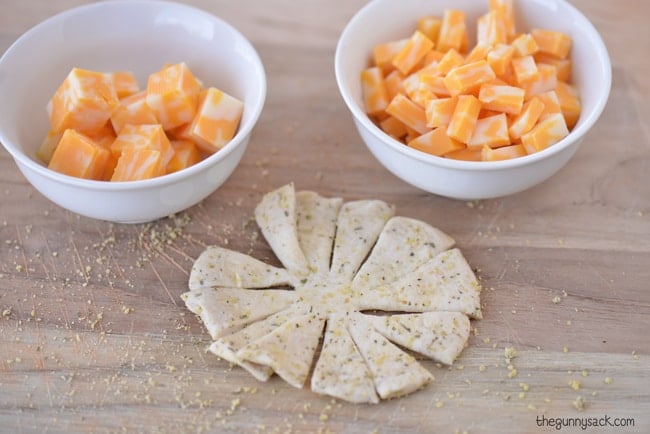
Cut the block of cheese into cubes and rectangles. You need 10 cubes of cheese that measure about 1/2 inch. You need about 120 small rectangles of cheese that measure about 1/2 inch by 1/4 inch.To make this step easier, cut ½ inch strips of cheese from the block, stack them up and cut them into smaller pieces.
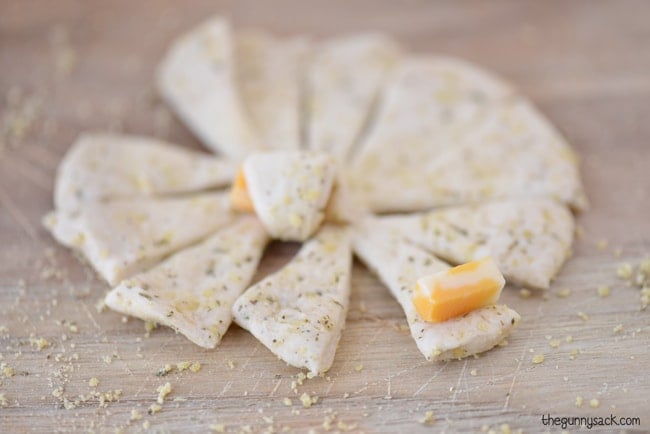
Roll a small rectangle of cheese up in every other segment of dough.
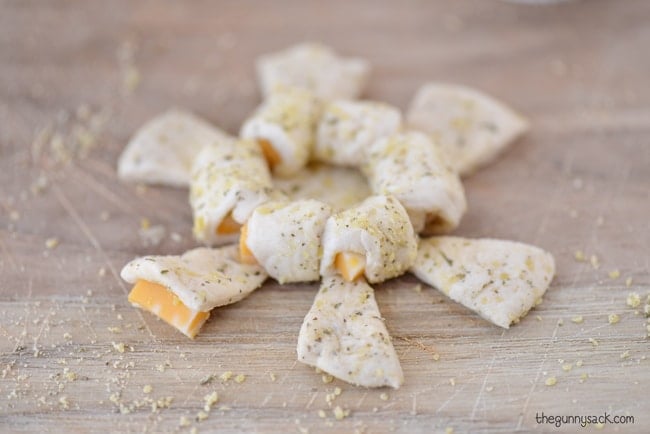
Then, roll a rectangle of cheese under the remaining segments of dough.
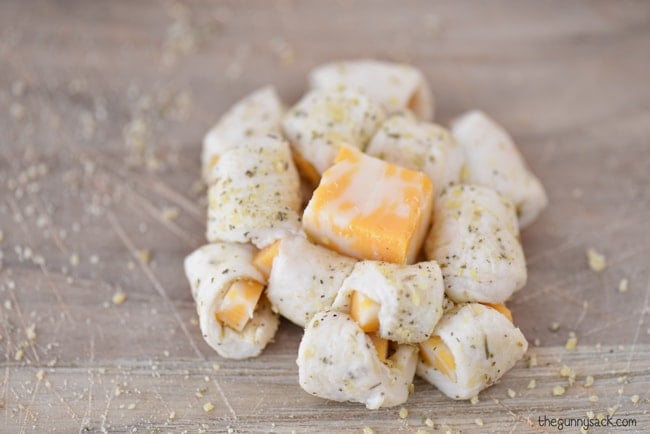
Put a cube of cheese in the center.
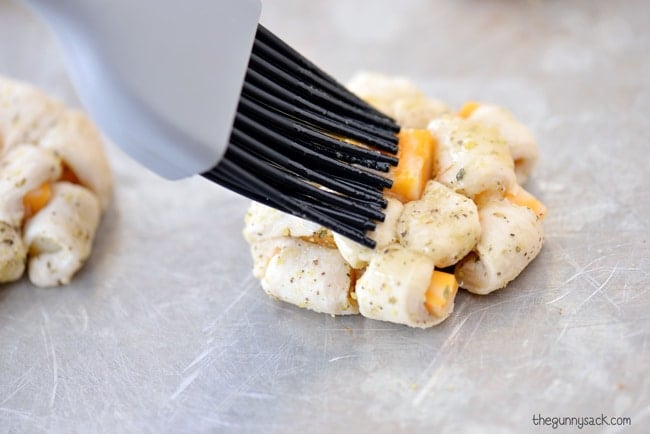
Brush the biscuits with melted garlic butter and sprinkle with more parmesan.

Bake at 400 degrees for 8-10 minutes or until golden brown. Allow them to cool slightly and then enjoy the warm, cheesy goodness! These Bloomin’ Garlic Cheese Biscuits work great as an appetizer, a snack or as a side for a meal.

Bloomin' Garlic Cheese Biscuits
Ingredients
- (2) 10.2 ounce tubes refrigerator biscuits two 5 count tubes
- 8 ounce block marble jack
- ½ cup grated Parmesan cheese, divided
- 1 teaspoon garlic powder, divided
- ½ teaspoon dried parsley
- ½ teaspoon dried oregano
- 2 tablespoon butter melted
Instructions
- Preheat oven to 400˚F.
- Flatten the biscuits and sprinkle them with parmesan cheese, 1/2 teaspoon garlic powder, parsley, and oregano.
- Make 4 slits in the biscuit one at the top, one at the bottom and one on each side. Then, cut two slits in each segment, so you end up with 12 segments of dough.
- Cut the block of cheese into cubes and rectangles. You need 10 cubes of cheese that measure about 1/2 inch. You need about 120 small rectangles of cheese that measure about 1/2 inch by 1/4 inch. To make this step easier, cut 1/2 inch strips of cheese from the block, stack them up and cut them into smaller pieces.
- Roll a small rectangle of cheese up in every other segment of dough leaving the center empty.
- Then, roll a rectangle of cheese under the remaining segments of dough.
- Put a cube of cheese in the center.
- Mix the melted butter and 1/2 teaspoon of garlic powder. Brush it on the biscuits and sprinkle with more parmesan.
- Bake at 400˚F for 8-10 minutes or until golden brown.

Nutrition
More Bloomin’ Recipes:


Cat says
It doesn’t say what to bake them in… cookie sheet? Muffin pan? Pie dish? Thank you!!
Tonia Larson says
I used a baking sheet but you can pretty much use whatever you want!