This microwave caramel candy recipe makes soft, chewy caramels everyone loves! You can make these homemade caramels with only 5 ingredients!

These caramels are fantastic because they only require a few ingredients, and you make them in the microwave! They are delicious as is, but you can also top them with sea salt, dip them in chocolate, or sandwich them between pretzels.
Table of contents
Tonia’s Notes
Everyone has their favorite treats that they like to make every year during the holidays. One of our family’s favorites is caramels. My mom has been making them for as long as I can remember.
I first learned how to make them when I was in middle school when I had to choose a topic for a demonstration speech. After the presentation was over, I passed out samples. They were a huge success, and I’ve been making them ever since!
How To Make Caramels In The Microwave
This caramel candy recipe is cooked completely in the microwave, which is the EASIEST way to make perfect caramels! I tested this recipe on the stovetop, and it was way more hands-on (stirring constantly) and harder to keep from burning. Having used both methods, I can 100% recommend using the microwave.

Put the granulated sugar, sweetened condensed milk, butter, and light corn syrup into a very large, microwave-safe bowl. The bowl needs to be large enough for the mixture to boil up.

Start by microwaving the caramel candy mixture on high for 5 minutes and then stir. The mixture is HOT so handle it with care.
Next, microwave for 5 minutes at 50% power and then stir. Do this two more times so that when you are done, the caramels have been in the microwave for 20 minutes total: 5 on high and 15 at 50%.
You may need to continue cooking the caramels in the microwave for 5-minute intervals at 50%, stirring after each interval, until the caramels are done. If you have a powerful microwave, cook at 30% power the last couple of times to prevent burning.

Remove from the microwave and stir in one teaspoon of vanilla extract. Pour into a lightly greased 9×13″ pan (lined with heavy foil if desired). Allow the caramels to cool completely at room temperature.

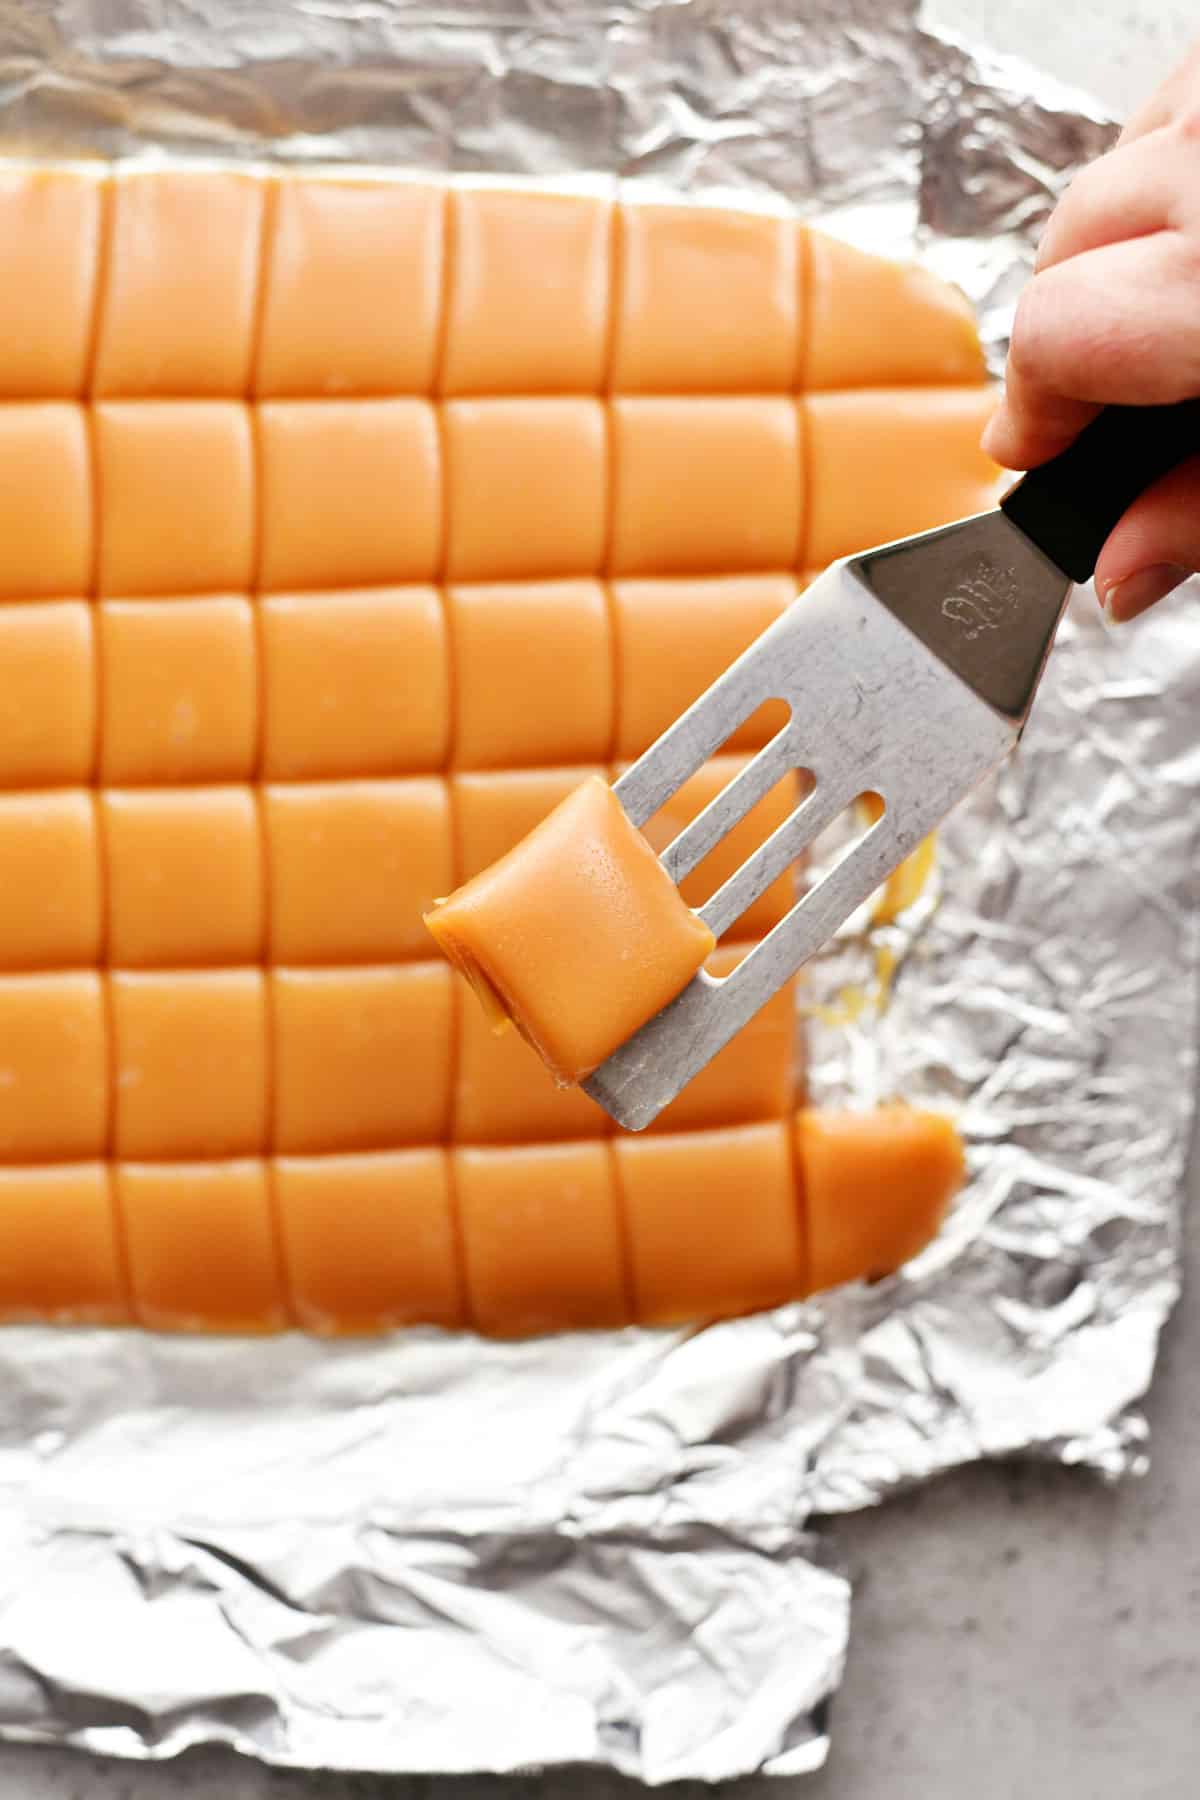
How To Cut Soft Caramels
I prefer lining my pan with heavy-duty foil and then spraying it with cooking spray. Then, once the caramels have cooled completely, use the foil to lift them out of the pan. Either cut them directly on the foil as shown above. Or flip the caramels over onto a cutting board, peel off the foil, and then proceed to cut them without the worry of bits of foil getting stuck to the caramels.
With A Knife: The most common way to cut caramels is to simply use a sharp, sturdy paring knife. If you are having issues with it sticking, spray the knife with a little cooking spray. This is the best way to cut them if you poured the caramel candy directly into a greased pan.
Use A Pizza Cutter: If you lined your pan with foil and are able to remove them from the pan as I did, you may be able to cut the caramels with a sturdy pizza cutter. This method allows you to cut even rows of caramels quickly. When cooked to a hard ball stage, the caramel candy may be too firm to use a pizza cutter.
Try An Ulu Knife: An ulu knife is a rocker knife that originated in Alaska. If you don’t already have one, it is a great addition to any kitchen, especially if you have small children and have to cut up food for them. You can buy an ulu knife online. This knife could be used both on the caramels in the pan and on the cutting board.

Wrapping Caramel Candy Method
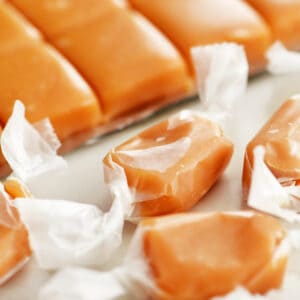
Once the caramel candy has been cut into pieces, it’s time to wrap them! Cut rectangles of waxed paper. Place a caramel candy in the center and fold the long sides of waxed paper up over the caramel. Then, twist the ends to hold the wrapper in place. Another option, if you don’t want the twisted tails, is to fold up the ends over the caramels.

Tips For Success
Microwaves Vary
Before we get started on the cooking instructions, let’s talk a little about microwaves. There are thousands of different microwaves available from many brands. Some of you will have brand-new microwaves, and others will have older ones. The wattage of your microwave determines the power. Most microwaves have between 600 and 1,200 watts. The higher the wattage, the faster your caramels will cook, so keep that in mind!
Candy Thermometers
I like to use a candy thermometer to check the temperature but keep in mind that candy thermometers can vary, which can give different results. The candy thermometer I used is called a ThermoPen.
To check your candy thermometer for accuracy, bring a pot of water to a rolling boil. Insert the thermometer into the water, and it should read 212˚F. If yours is slightly less or more, you’ll have to make those slight adjustments when checking the caramel.
Soft Ball Stage
The hardest part of the process is knowing when the caramels are done. My mom is an expert on this since she’s made them so many times. They have to be a golden caramel color. The notes on the recipe say that the caramel should form a soft ball in cold water. For soft ball stage, it should reach 238˚F-240˚F.
Some people prefer their caramel candy to be firmer and chewier. If that is what you are looking for, cook the caramels longer until 245˚F, which is firm ball stage.
I went right in between the two stages and cooked my caramels to 244˚F (measured immediately after removing the bowl from the microwave), and they were perfect for my family. To get to that stage, I had to cook mine 10 minutes longer (5 minutes at 50%, stir, and then 5 additional minutes at 50%).

How To Store Caramels
After wrapping the caramels in waxed paper, put them in a container and store them in the fridge for 2-3 weeks. Caramel candy can also be stored in the freezer for up to 12 months. Thaw at room temperature for 1 to 2 hours.
Flavor Variations
Using flavored extracts is a fun way to customize the caramel candy. You can even make several different flavors and give the caramels as gifts to friends and family during the holidays.
- Orange Cream Caramels: Add a teaspoon of orange extract along with the vanilla.
- Licorice Caramels: Stir in 1-2 teaspoons of anise extract instead of the vanilla (add black gel food coloring if desired).
- Cinnamon Caramel Candy: Substitute the vanilla with 1 teaspoon of cinnamon oil and red no-taste gel food coloring.
- Caramel Apple Caramels: Add 1 teaspoon of green apple flavoring along with the vanilla.
- Maple Cream Caramel Candy: In addition to the vanilla, add 1/2 teaspoon of maple flavoring.

Caramel Candy Issues
Although making these caramels is a simple process with basic ingredients, issues can arise. It may take a few attempts to make caramel candy, and even the pros mess up from time to time. Here are a few ways to salvage the caramel when you have issues.
If your caramel candy is too soft, you didn’t cook it long enough. Sometimes they will hold their shape as long as they are chilled. If so, refrigerate the caramels after wrapping and only remove them when serving.
Another option is to remelt the caramels with a couple of tablespoons of water. Cook them until they are at the right temperature.
My mom had a brilliant solution when one of her batches was too soft. She put a dollop of the too-soft caramel on a pretzel, topped it with another pretzel, and dipped it in melted chocolate!
Sounds like your caramels were cooked too long. Like with the too soft caramels, you can remelt them with a couple of tablespoons of water and cook until it is a lower temperature than what you used the first time.
If your caramels are burnt tasting or smelling, they were either overcooked or cooked too quickly. Give yourself a break, and remember that it happens to everyone from time to time. It is best to toss that batch and start over fresh.
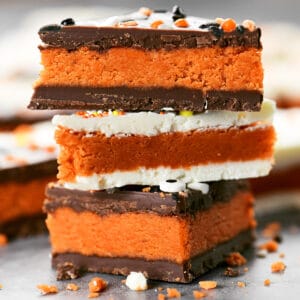
More Candy Recipes
- Rolo Pretzel Turtles only require three ingredients to make!
- This smooth, creamy Fudge Recipe is a classic.
- These Nut Goodie Bars are one of my family's all-time favorites.
- Candy Bar Pretzel Bites are popular during the holidays.
- Homemade Peanut Brittle can’t be beat!
Caramel Candy
Video
Equipment
- Alaskan Ulu
Ingredients
- 1 cup butter
- 14 oz sweetened condensed milk
- 2 cups granulated sugar
- 1 cup light corn syrup
- 1 teaspoon vanilla extract
Instructions
- Be VERY cautious when making, stirring, and pouring caramel candy because it is super HOT.
- In a very, large microwave-safe bowl, put the butter, sweetened condensed milk, sugar, and corn syrup. Microwave on high for 5 minutes and then stir.
- Microwave at 50% power in 5 minute intervals for 15-25 minutes total (depending on your microwave), or until caramel reaches 238˚F to 244˚F on a candy thermometer. It should be a deep golden caramel color and should form a soft ball in cold water.
- Remove from the microwave and stir in the vanilla extract.
- Pour caramels into a lightly buttered 9×13″ pan. Cool completely at room temperature.
- Cut into squares and wrap in waxed paper.
- Store in an airtight container the refrigerator or freezer.

Notes
Storage
Store wrapped caramels in an airtight container in the fridge for 2-3 weeks. Or in the freezer for up to 12 months. Thaw frozen caramels at room temperature for 1 to 2 hours.Flavor Options
- Orange Cream Caramels: Add a teaspoon of orange extract along with the vanilla.
- Licorice Caramels: Stir in 1-2 teaspoons of anise extract instead of the vanilla (add black gel food coloring if desired).
- Cinnamon Caramel Candy: Substitute the vanilla with 1 teaspoon of cinnamon oil and red no-taste gel food coloring.
- Caramel Apple Caramels: Add 1 teaspoon of green apple flavoring along with the vanilla.
- Maple Cream Caramel Candy: In addition to the vanilla, add 1/2 teaspoon of maple flavoring.


Jennifer @ The Jenny Evolution says
You have the most scrumptious cookie recipe! I’m hosting the ultimate holiday cookie recipe exchange extravaganza online at The Jenny Evolution and wanted to be sure to invite you. I hope you’ll link up and see if you’re highlighted later in the week 🙂
Jennifer @ The Jenny Evolution
P.S. This series is sure to get a lot of attention as it’s going to be a week’s worth of cookies with FIVE different cookie round-us. So be sure to join!
thepaintedapron.com says
Oh, these look amazing. I love the red & white twine touch. I am pinning, would love to make these as favors for my guests this season. Thanks so much!Jenna
Bliss says
Pinned the poster so others can check out all the desserts.Bliss
onekriegerchick says
These look AMAZING and I will be adding them to my neighbor treat plates this year. Thanks for sharing!
onekriegerchick says
These look AMAZING and I will be adding them to my neighbor treat plates this year. Thanks for sharing!
Tonia L says
Thanks! Your neighbors will love them!
2busy says
My mom is the caramel maker in our family, but these look delicious. I just may have to try my hand this year. It must have taken you a while to come up with all those sweet treats…
Julie Cohn says
These look so delicious, and easy to make. I might have to use these for teacher gifts! 🙂
Jane Craske says
You marvel! I’d love to both give and more excitedly, get these C:
Tonia L says
Thanks Jane! They are definitely gift worthy!
Live Laugh Rowe says
YUMMMMMMMM!!!! Pinning to definitely make 🙂 Thanks for sharing!!
Tonia L says
Thanks Kelly!
Carol, The Answer Is Chocolate says
I love that these can be made via microwave. I can’t wait to try making these. Pinned!
Tonia L says
I know! How easy is that? Have a great weekend Carol!